

A dirty AR-15 is a rifle you cannot count on. Carbon builds up in the bolt carrier group after every range session, and dust from outdoor range sessions can work its way into the action and compound that fouling. Proper AR-15 cleaning keeps your rifle cycling reliably, protects the barrel, and extends the life of every part. At AR15Parts.com, we ship from our Denison, TX facility and offer expert parts advice by phone or through our contact form. Below, we cover cleaning from field strip to final lubrication.
Stock your bench before your next range trip. We carry bore brushes, chamber tools, solvents, and lubricants for routine maintenance.
Key Takeaways
- AR-15 cleaning should happen after every range session, with a deeper detail clean every 500 to 1,000 rounds.
- The bolt carrier group is the highest-fouling component and requires full disassembly to clean properly.
- Dust and humidity can accelerate fouling and surface rust on unprotected steel parts.
- A quality CLP or dedicated solvent and lubricant combination protects the barrel, bolt, and gas system between sessions.
- A printed round-count maintenance schedule helps you track cleaning intervals and catch worn parts before they cause malfunctions.
What Tools Do You Need to Clean an AR-15?
Essential Tools
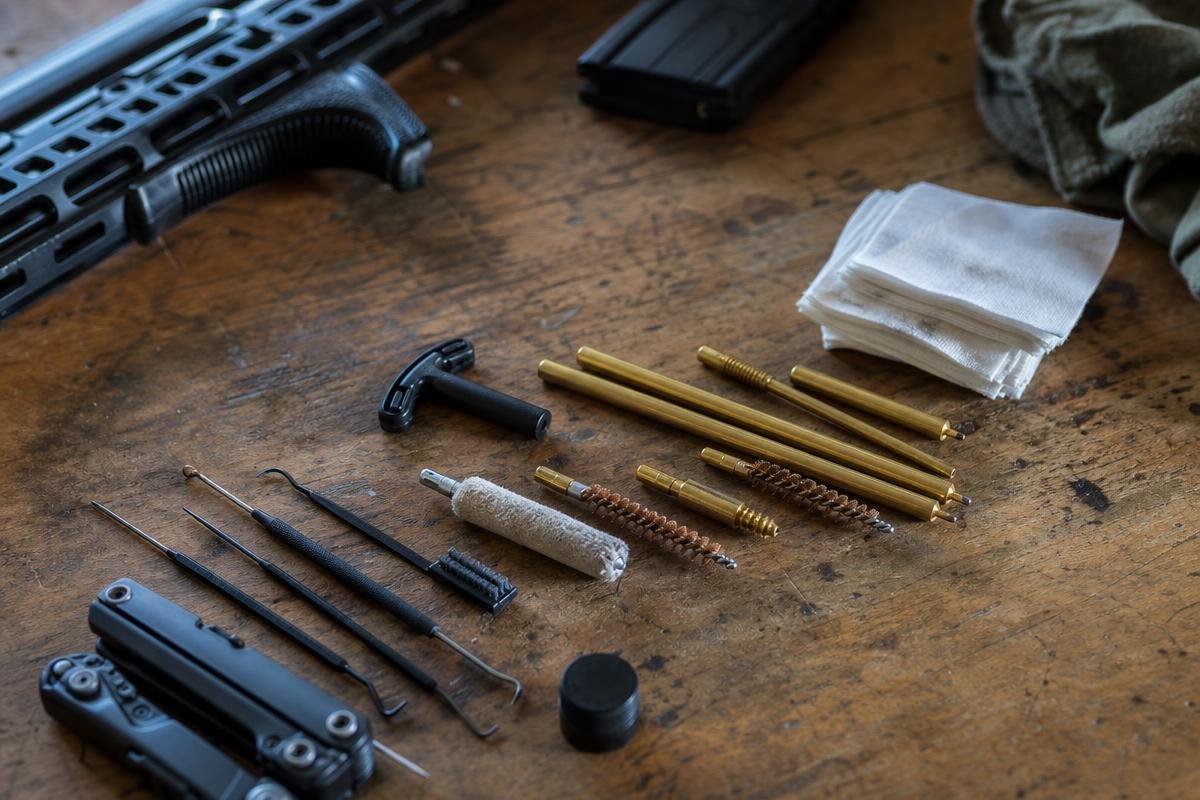
You do not need a cabinet full of gear to do AR-15 cleaning right. You need the right tools for the specific parts you are working on. A caliber-matched bronze or nylon bore brush, a cleaning rod or bore snake, a patch holder with cotton patches, and a star-shaped chamber brush cover the barrel and chamber. Add a carbon scraper or AR-specific multi-tool for the bolt tail and carrier key, a toothbrush-style detail brush for the lower receiver, dental picks for the firing pin channel and bolt tail recesses, and a parts tray to keep small pins from rolling off the bench.
Solvents, Lubricants, and Protectants
Carbon solvent is the first thing you reach for on a fouled bolt carrier group. Hoppe's No. 9, M-Pro 7, and Slip 2000 Carbon Cutter all cut carbon deposits without damaging metal or polymer. For general use, a quality CLP handles cleaning, lubricating, and protecting in one step. The BCG specifically benefits from a dedicated lubricant like Lucas Extreme Duty Gun Oil or Slip 2000 EWL, which stay on high-friction surfaces under heat and pressure. Choose a lubricant suited to the heat and your rifle's maintenance needs.
In hot weather, thin oils can migrate off the bolt carrier during a long outdoor range session. A slightly heavier CLP or suitable grease on the BCG can stay in place longer under heat. Consider that when running an AR-15 complete upper through a full day at the range.
Not sure which lubricant holds up in hot weather? We stock the heavier-duty oils that stay put on a hot BCG.
Browse Lubricants and Solvents
Optional Additions
A bore guide protects the chamber mouth from rod damage and keeps solvent out of the lower receiver. A nylon-coated cleaning rod prevents bore wear if you use a rod instead of a bore snake. An AR-15 armorer's block holds the lower steady while you work. For heavily fouled BCGs, an ultrasonic cleaner cuts soak time significantly. These are not required for routine maintenance, but they earn their place if you shoot often or run AR-15 barrels in high-round-count configurations.
How to Disassemble Your AR-15 for AR-15 Cleaning
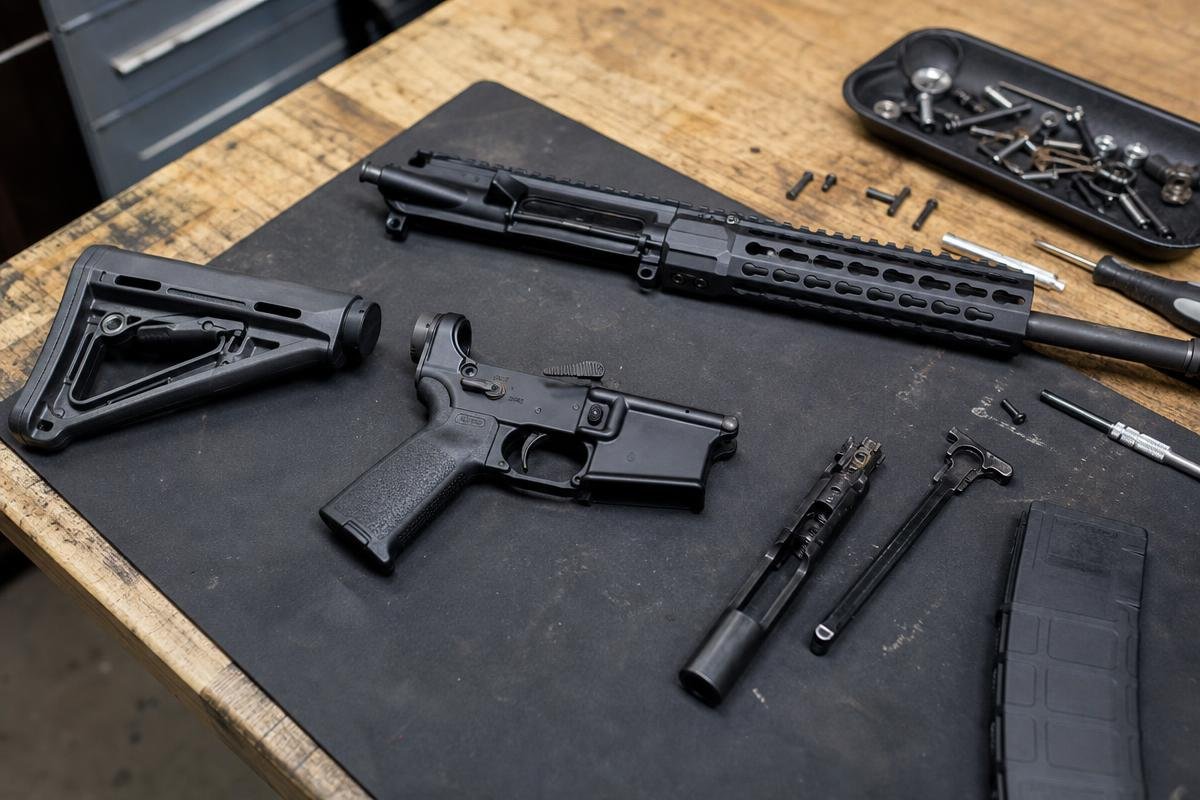
Proper disassembly is the foundation of any AR-15 cleaning session. At outdoor ranges, dust and grit can work into the action through the ejection port and charging handle gap. A thorough teardown removes fouling that a quick wipe-down will miss. Follow these steps in order.
- Clear and prep. Remove the magazine, lock the bolt to the rear, then visually and physically inspect the chamber. Nothing proceeds until the rifle is confirmed empty. Set up on a flat surface with a cleaning mat and a parts tray. If you are working outdoors after a range day, a parts tray is not optional, because small components disappear fast in gravel or grass.
- Separate upper and lower. Push out the rear takedown pin, then the front pivot pin. Both stay captured in the lower receiver on a properly fit rifle, and finger pressure is enough. A punch is acceptable if a pin is stiff, but forced removal suggests a fitment issue worth inspecting. Separate the upper from the lower and set both on your mat.
- Remove the charging handle and BCG. Pull the charging handle rearward slightly to unlock it. Tilt the bolt carrier group upward, slide it out of the upper receiver, then pull the charging handle straight back and lift it clear. Keep the BCG oriented bolt-face forward as you set it down.
- Disassemble the BCG. Remove the firing pin retaining pin, then slide the firing pin out the rear of the carrier. Rotate the cam pin 90 degrees and lift it free, then slide the bolt out of the carrier. Inspect the gas rings for visible damage, excessive wear, or loss of tension. Extend the bolt from the carrier and stand the carrier on its face; if the bolt sinks into the carrier under its own weight, the gas rings are worn and need replacement.
- Remove the buffer and buffer spring. Depress the buffer retainer with a finger or a punch, then tilt the buffer out of the buffer tube, followed by the spring. These two components are neglected more than any other part of the rifle. Wipe the tube interior clean before reassembly.
If you are building or upgrading, compare compatible AR-15 upper configurations and inspect worn or damaged parts before they cause a malfunction.
How to Clean Each AR-15 Component
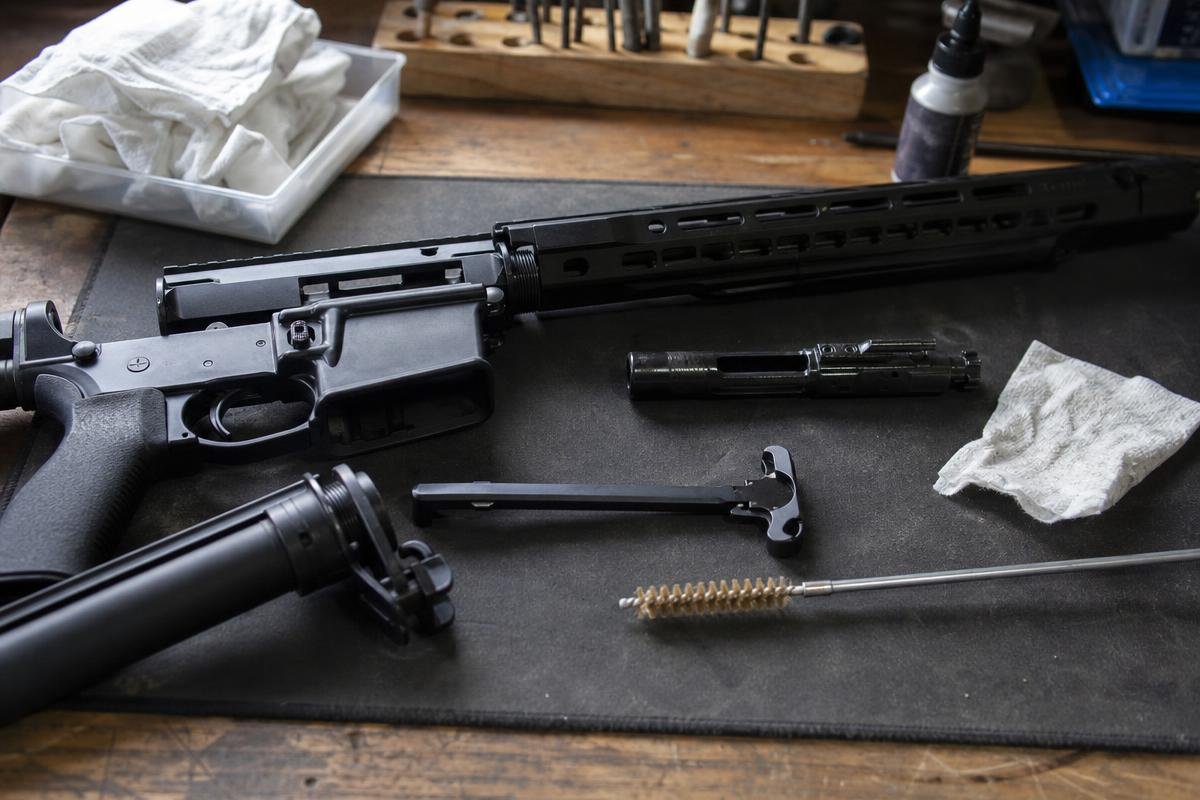
Disassembly is done. Now you clean. Each component has a specific fouling pattern and a specific tool that addresses it. Work through them in order and watch for signs of gas-system trouble.
Bolt Carrier Group
On a direct-impingement rifle, hot gas vents directly back into the carrier every time it cycles, which is why the BCG accumulates carbon faster than the bore, chamber, or receivers combined. If it is heavily fouled, submerge the carrier body and bolt in carbon solvent for 5 to 10 minutes before brushing. That soak time does the hard work.
Run a bronze brush through the carrier interior. Use a detail brush on the bolt body, extractor groove, and bolt tail recesses. A dental pick clears carbon from the tight recesses where brushes cannot reach. The firing pin channel must be clean and completely dry. Oil pooling in that channel creates real ignition risks. Do not skip that step.
Shooters running their rifles in dusty or gritty conditions will see the BCG interior foul faster than the bore. After any dusty outdoor session, prioritize the BCG first.
Barrel and Chamber
Run a solvent-soaked patch from the chamber end toward the muzzle. Follow it with a dry patch, then make 5 to 6 passes with a bronze brush. Run dry patches until they come out clean. Finish with one lightly oiled patch.
Use a star-shaped chamber brush with solvent, then follow with a dry patch. A fouled chamber is one of the most common causes of failures to extract. Barrel material can affect how easily fouling is removed. Chrome-lined AR-15 barrels are more forgiving and easier to clean, but still need regular attention. Stainless match-grade barrels are more sensitive to carbon and copper buildup and need attention sooner.
Upper and Lower Receivers
Wipe the upper receiver interior with a solvent-dampened cloth. Pay close attention to the feed ramps. Carbon buildup there causes feeding problems that are easy to prevent. Use a detail brush on the trigger group area of the lower receiver. Do not soak the lower in solvent. It can affect polymer components and stock hardware. A brush and a cloth are enough.
Gas Tube and Gas Block
Do not force brushes, pipe cleaners, or debris through the gas tube. If you suspect a gas-system restriction or cycling problem, have a qualified gunsmith inspect the rifle.
A gas-system restriction can cause short-stroking. After dusty sessions, watch for cycling problems and clean accessible BCG and receiver surfaces. If you suspect a gas-tube restriction, have a qualified gunsmith inspect the rifle.
Lubrication: Where to Oil Your AR-15 and How Much
Most malfunctions blamed on a dirty rifle are actually caused by under-lubrication. The AR-15 is a high-friction design. It runs best wet, not dry. If your bolt carrier group feels tacky or drags on the rails, you need oil, not more scrubbing.
High-Friction Points
Focus your oil on the surfaces that actually move under load. A light coat on each, not a single drop in one spot, is the right approach.
- Bolt body: all four sides, the area behind the gas rings, and the cam pin hole
- Exterior of the bolt carrier: all four bearing surfaces along the upper receiver rails
- Charging handle latch
- Buffer and buffer spring
- Takedown and pivot pins
The BCG gets a light coat across all exterior surfaces. Work it in by hand before reassembly. One drop on a single spot is not enough coverage for a component cycling hundreds of times per session.
How Much Oil Is Enough
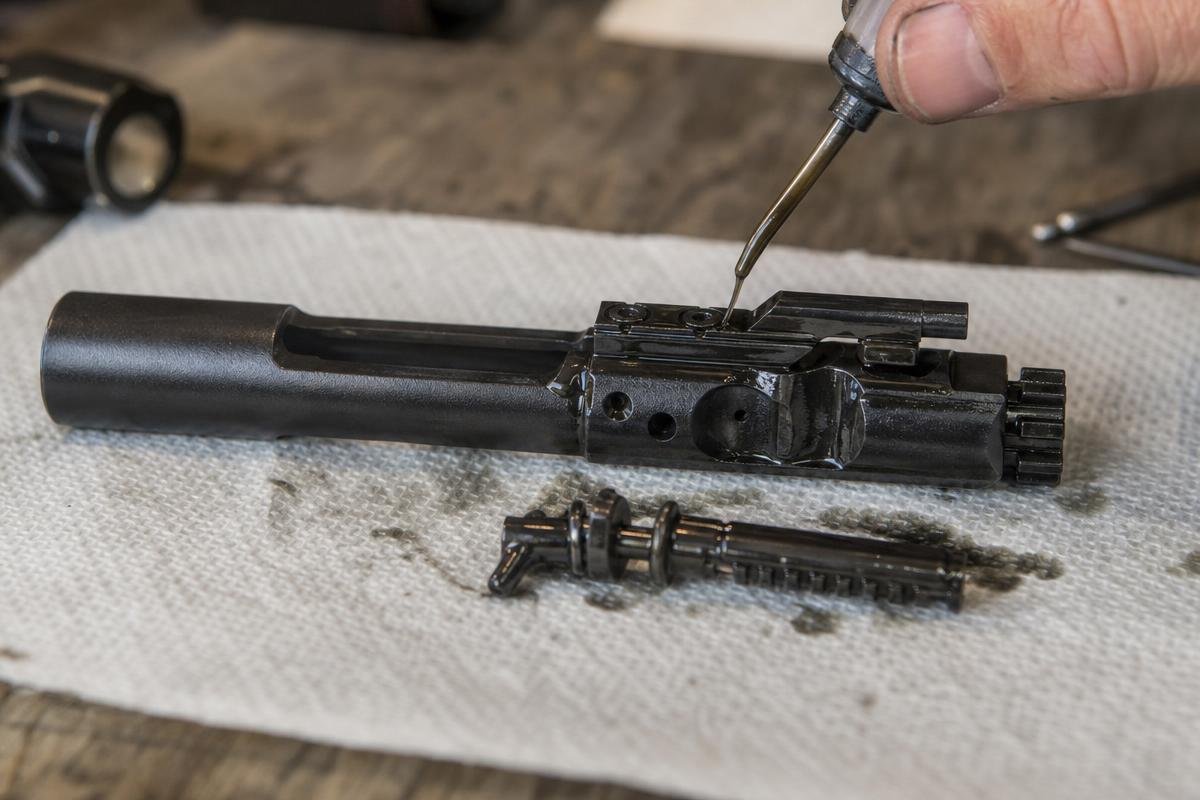
A wet BCG does not cause malfunctions. Excess oil blows off in the first few rounds. An under-oiled BCG causes accelerated wear and extraction failures. That is the real risk.
Hot conditions can thin oil faster than many shooters expect. A BCG lubricated before a morning session can run noticeably drier by midday during a high-round-count day. A slightly heavier application on the BCG before a long outdoor session is one practical adjustment in hot, dusty conditions, especially when wind-driven dust compounds the problem by absorbing oil off metal surfaces.
The same lubrication principles apply across compatible AR-15 configurations.
What to Keep Dry
Three areas should never have oil on them.
- The bore: run one dry patch after your final oiled patch to remove residual oil before storage or shooting
- The firing pin channel: oil here migrates to the primer and causes ignition failures
- The chamber: oil in the chamber contributes to case-head separation under pressure
This maintenance overview covers the whole platform, not just the BCG. Get the lubrication right and most reliability issues disappear before they start. Questions about lubricant choices or parts compatibility for your build? Call us at (888) 706-0633 or shop our full parts catalog online.
How Often Should You Do AR-15 Cleaning? A Schedule by Round Count
Round count is a more reliable trigger for AR-15 cleaning than calendar time. If you shoot 100 rounds per range session, you hit the 250-round interval in three trips. Environmental fouling compounds between sessions too, especially for shooters running their rifles in dusty environments. Dirt and grit that enter through the ejection port do not wait for the next round to cause wear.
Every 250 Rounds
This is a quick field-strip session. Separate upper from lower, pull the charging handle and bolt carrier group, and wipe the BCG with a dry or lightly dampened cloth. Re-lubricate the BCG at the four standard contact points and run a dry patch through the bore. Budget 10 to 15 minutes. This interval covers a typical range day of two or three magazines.
Every 500 Rounds
Run the full cleaning procedure described in the previous section. Use a bore brush, chamber brush, full BCG disassembly and scrub, and a wipe-down of both receivers. Re-lubricate all high-friction surfaces. Inspect the gas rings for visible damage, excessive wear, or loss of tension. Shooters who also use their rifles in dusty environments may find this interval arrives faster than the round count alone suggests.
Every 1,000 Rounds
Full cleaning plus a parts inspection. Check the extractor spring and insert; if the extractor does not snap back crisply, replace it. Inspect the gas rings again for visible damage, excessive wear, or loss of tension. Check the buffer retainer spring and inspect the barrel crown for damage. If you want to review AR-15 barrels for a replacement or upgrade at this milepost, this is the right time to assess crown condition.
Annual or Pre-Storage
Clean the rifle fully even at low round counts. Apply a light coat of oil to all metal surfaces. Store with the action closed and buffer spring slightly compressed. If you are storing the rifle in a humid environment, place a silica gel pack in the case. Unprotected steel parts can show surface rust faster than most shooters expect in humid conditions.
Cleaning Considerations for Outdoor Shooting and Storage
Heat and Dust at Outdoor Ranges
Shooting outdoors in hot, dusty weather can leave grit in the action through the ejection port and charging handle gap. Heat can also thin lubricant, so a BCG you lubed in the morning may run drier by midday during a high-round-count session.
Keep your dust cover closed when you are not actively firing. After any outdoor range session in dry, windy conditions, wipe down the BCG and upper receiver interior before you put the rifle away. Do not wait until your next range trip. Fouling that sits in a hot rifle overnight bonds faster than fouling in a cool, humid environment.
Suppressor Use and Increased Carbon Blowback
Running a suppressor changes your AR-15 cleaning schedule. Carbon blowback into the upper receiver and BCG increases significantly with a can attached. Drop your BCG cleaning interval to every 150 to 200 rounds instead of 250. The gas tube also accumulates carbon faster, so check it more frequently. If you run suppressed and also shoot at dusty outdoor ranges, those two factors stack up quickly. No upper substitutes for a consistent AR-15 cleaning routine.
Storing Your AR-15 in Humid Conditions
Humidity can raise the risk of surface rust on unprotected steel parts, especially during extended storage. A dehumidifier rod in your gun safe is a straightforward option. Apply a light coat of oil to the barrel exterior and receiver exterior before any extended storage period. Check your AR-15 barrels for surface oxidation if the rifle has sat for more than a few weeks in humid conditions.
Frequently Asked Questions
What Is the Most Common Cause of a Malfunction Right After Cleaning?
Over-lubrication of the firing pin channel is the most frequent culprit. Oil pooling in that channel can cause light primer strikes or unreliable ignition. The second most common cause is a cam pin installed in the wrong orientation during bolt reassembly. After reassembly, follow the manufacturer's instructions for a safe function check.
Do I Need to Clean a Brand-New AR-15 Before I Shoot It?
Yes. Factory rifles ship with a preservative coating, similar to cosmoline, that protects the metal during storage and shipping. That coating is not a lubricant. Wipe down the bolt carrier group and bore, then apply proper lubrication before your first range session. If you ordered a complete AR-15 upper from us, the same rule applies: wipe it down and lube it before you run it.
Is a Bore Snake Good Enough, or Do I Need a Full Cleaning Rod Kit?
A bore snake works well for quick post-range wipe-downs and field use between full cleaning sessions. It does not scrub as thoroughly as a cleaning rod with a bronze brush and patches. For a full AR-15 cleaning at the 500-round mark, use a rod kit. For a fast pass after a short range session, a bore snake is adequate.
Which Solvent Should I Use?
Hoppe's No. 9 is the most widely available option and handles general carbon fouling well. M-Pro 7 and Slip 2000 Carbon Cutter are water-based alternatives that are easier on finishes. For heavy carbon buildup on the bolt carrier group, a dedicated carbon solvent outperforms a general-purpose CLP.
We carry cleaning tools, solvents, lubricants, and replacement parts for routine maintenance. We ship from our facility at 4000 Texoma Pkwy, Denison, TX 75020. Questions about parts for your next range session? Call us at (888) 706-0633 or contact our team.