
AR15Parts.com supplies firearms, parts, and accessories from 4000 Texoma Parkway, Denison, TX 75020. Learn how to clean AR-15 components through normal field stripping, inspection, cleaning, lubrication, and reassembly. Start with an unloaded rifle, use caliber-appropriate tools, and follow your firearm manufacturer’s manual where its instructions differ. For help identifying a replacement part or compatible component, contact our team.
Key Takeaways
- Remove all ammunition and verify the chamber and magazine well are empty before any AR-15 cleaning procedure.
- Routine cleaning begins with normal field stripping, separating the upper and lower receivers and removing the charging handle and carrier assembly.
- Focus on the chamber, bore, bolt assembly, and upper receiver interior, and remove old or contaminated lubricant.
- Lubricate the carrier rails, cam pin, bolt contact surfaces, and charging-handle contact points with a light film, not excess oil.
How to Clean an AR-15 Safely
Carbon fouling, powder residue, moisture, and old lubricant can conceal wear and contribute to sluggish cycling. Cleaning AR-15 components is not about making every surface bare metal. It is about removing contamination, checking critical parts, and restoring the light lubrication needed for normal movement.
Old oil can trap grit and carbon around the carrier assembly, making it harder to spot cracked gas rings, extractor damage, worn contact surfaces, or a bent retaining pin. Cleaning helps reveal those conditions, but it does not repair damaged, improperly fitted, or incorrectly assembled components. Stop using the rifle if you find a crack, missing material, a loose gas key, severe lug damage, or a part that binds.
For normal maintenance, work methodically: clear the rifle, field strip it, clean the bore and chamber from the rear, wipe and inspect the moving parts, lubricate the proper contact areas, and perform a no-ammunition function check.
Start With a Safe, Unloaded Rifle and a Clear Work Area
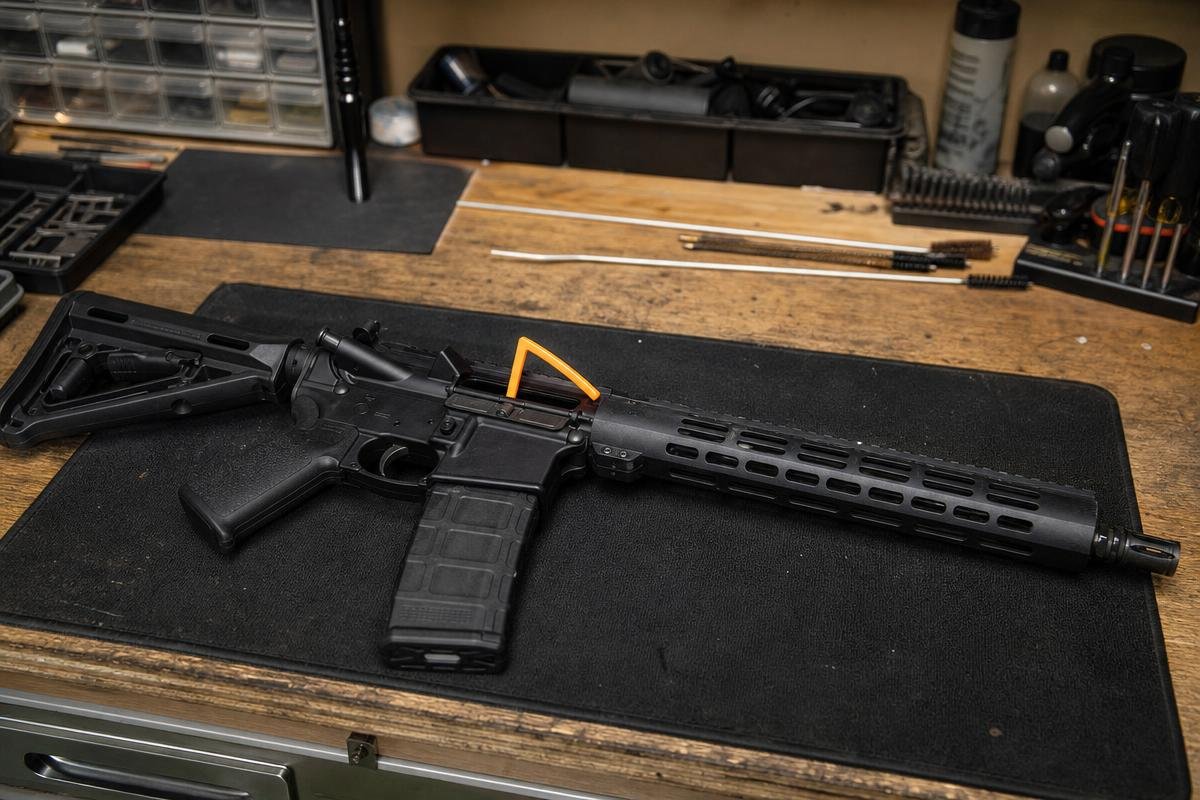
Do not start cleaning until the magazine is removed, the action is locked open, and both the chamber and magazine well are visually and physically checked. Keep all live ammunition away from the cleaning bench.
Clear the Rifle in the Correct Order
Point the muzzle in a safe direction. Remove the magazine, lock the bolt to the rear, inspect the chamber, then inspect the magazine well. Look and feel for a cartridge or magazine before moving the rifle to the bench. Insert a chamber flag after you verify the rifle is empty. It provides a visible reminder that the action was checked while you work around the firearm.
Set Up a Bench That Keeps Parts Organized
Use a stable bench with good lighting, a cleaning mat, and a small parts tray. The mat protects the finish and helps prevent the firing pin retaining pin, takedown pins, patches, and small springs from rolling away.
Keep solvent, patches, brushes, and lubricant on one side of the mat. Keep live ammunition in another room. A clear work area reduces avoidable handling mistakes and makes inspection easier.
Limit Disassembly to Normal Field Stripping
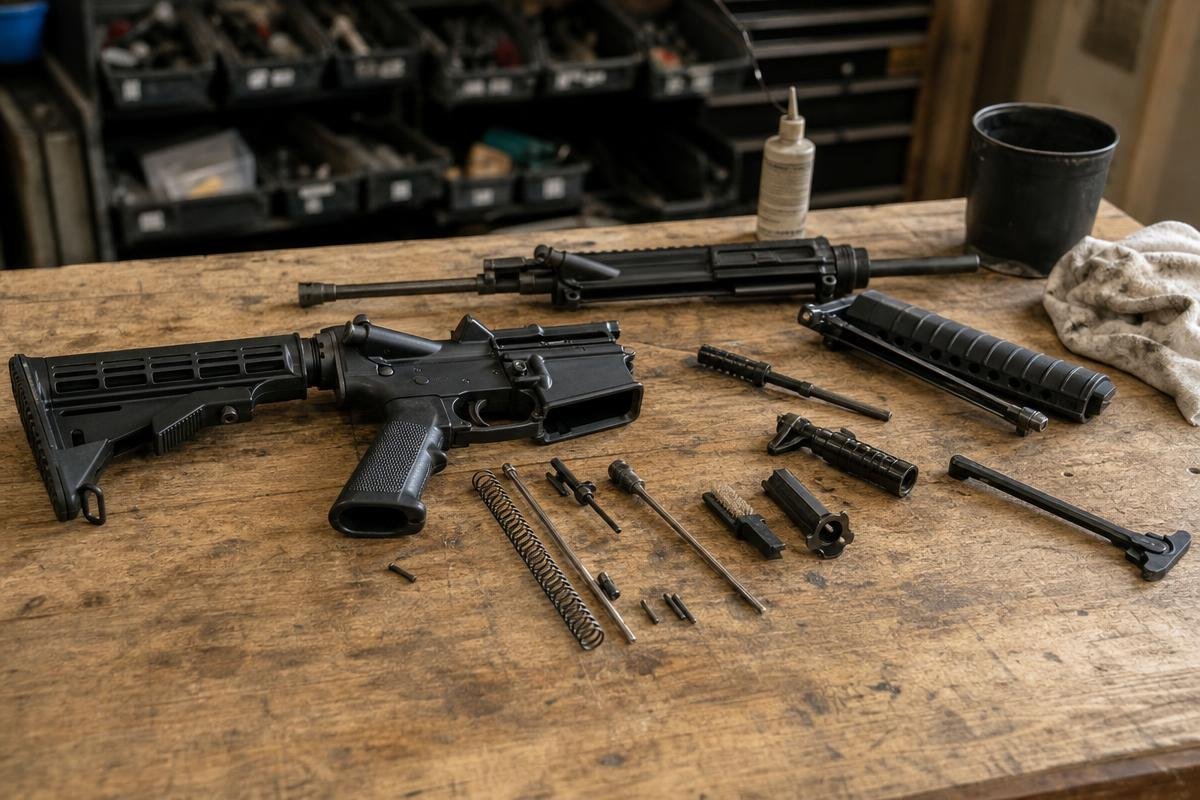
Routine field stripping means separating the upper and lower receivers, then removing the charging handle and bolt carrier group. This provides access to the chamber, bore, upper receiver interior, and moving parts without taking apart assemblies that do not require regular removal.
Do not disassemble the trigger group, gas block, muzzle device, or buffer assembly without the right tools and manufacturer guidance. Do not force a damaged charging handle or carrier assembly back into service. If an upper assembly has damage or corrosion beyond routine maintenance, review our 5.56 NATO complete upper receivers before returning the rifle to use.
What Do You Need to Clean an AR-15?
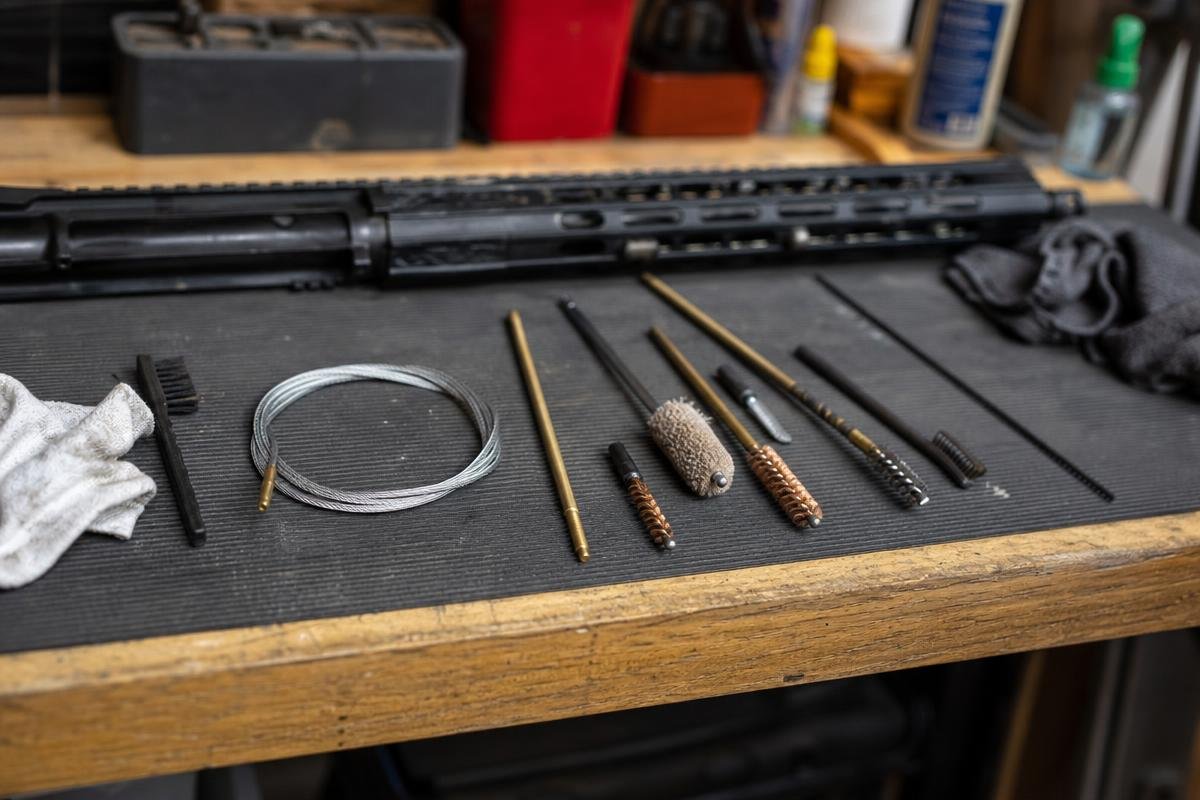
A practical AR-15 cleaning kit should remove loose fouling, support inspection, and protect the rifle’s finish. Choose tools for the rifle’s caliber and maintenance needs rather than trying to polish every part aggressively.
Bore and Chamber Tools
Use a one-piece cleaning rod or pull-through system, a caliber-correct jag, cotton patches, a bore brush, and a chamber brush. For most 5.56 NATO complete upper receivers, confirm the bore and chamber tool sizes specified by the firearm and tool manufacturers before use. A bore brush follows the rifling through the barrel. A chamber brush is different, with a larger rear section that reaches the chamber and locking-lug recesses where a standard bore brush cannot clean effectively.
Brushes, Solvent, and Lubricant
Use firearm-specific solvent and lubricant according to their labels. Solvent loosens carbon and powder residue, while lubricant protects moving contact points after the parts are cleaned and dried. Nylon utility brushes are useful for loose exterior carbon and grime on the carrier, bolt, charging handle, and receiver surfaces. Use patches, swabs, and a brush instead of hard scraping tools whenever possible.
What Not to Use on Finished Surfaces
Steel picks can damage finished surfaces, particularly anodized aluminum receivers. Avoid wire wheels, aggressive scraping, and hard steel tools on anodizing, coatings, and bearing surfaces.
Do not allow solvent to pool in the lower receiver. Apply it to a patch or brush instead, then wipe the area dry. If cleaning reveals damage to a component, stop and determine the cause before reassembly.
Clean the Barrel and Chamber Without Damaging the Bore
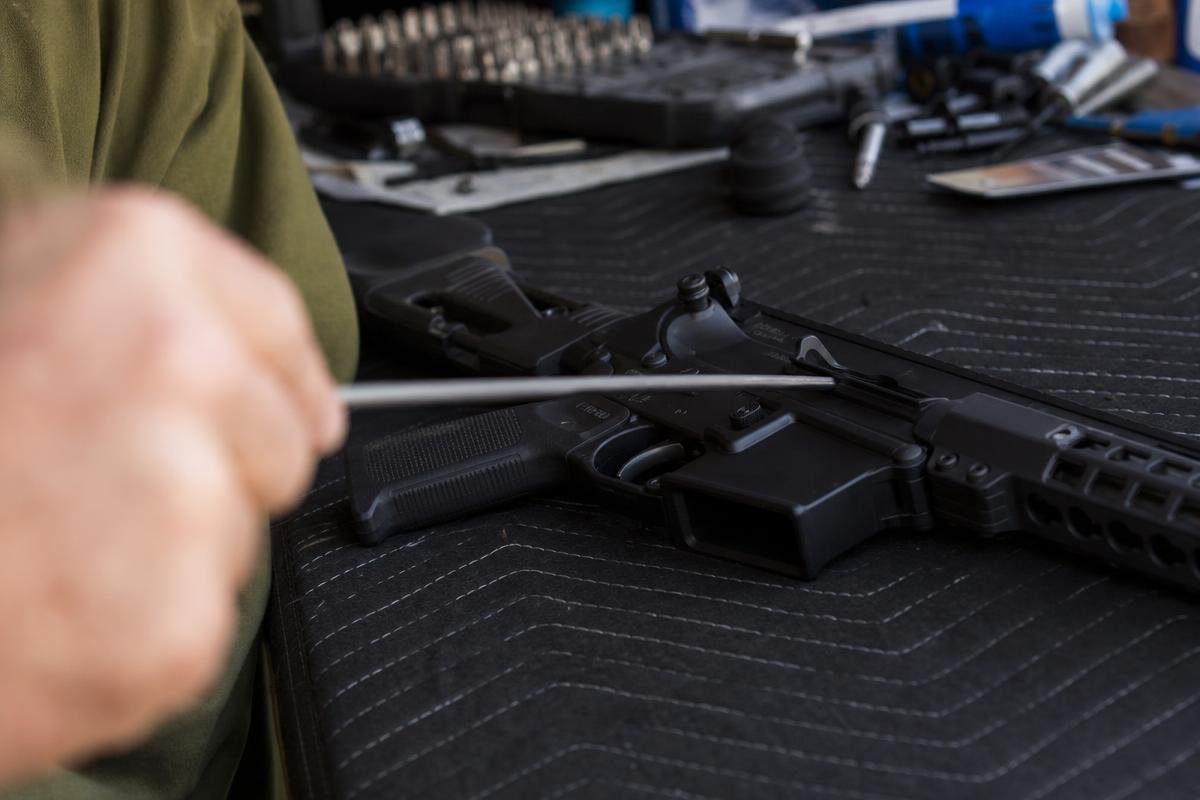
Clean an AR-15 barrel from the chamber end whenever your setup allows. This protects the muzzle crown and pushes residue forward and out through the muzzle rather than back into the receiver.
Clean From Chamber to Muzzle
Use a bore guide if your setup accepts one. Apply bore solvent to a correctly sized patch, then push it through the bore from chamber to muzzle in one controlled pass.
- Let the solvent work for the time listed on its label.
- Make several controlled passes with a caliber-correct bore brush.
- Push clean patches through until they come out with little residue.
- Finish with a dry patch, then inspect the bore under good light without over-cleaning it.
Do not pull a dirty patch back through the bore after it exits the muzzle if your rod system is designed for one-way passes. Suppressed rifles commonly accumulate more carbon in the action, chamber area, and carrier assembly, so inspect and clean them more frequently than an otherwise similar unsuppressed setup.
Use the Chamber Brush Around the Locking Lugs
The chamber collects carbon and brass residue where the cartridge seats. Use an AR-15 chamber brush with solvent, turning it gently to reach the chamber and locking-lug recesses. Follow with dry chamber patches or swabs until they come out clean. Check for loose fibers before reassembly. A clean chamber supports complete bolt lockup and consistent extraction.
Leave the Gas System Alone During Routine Cleaning
You do not need to disassemble the gas system for normal cleaning. The gas tube is not a bore, and forcing cleaners, pipe cleaners, or tools through it can create more problems than it solves. Wipe accessible fouling from the upper receiver and barrel extension instead. If you find a damaged barrel, corrosion that will not clean up, or a worn chamber, review our complete AR-15 uppers before putting the rifle back into service.
Service the Bolt Carrier Group and Charging Handle
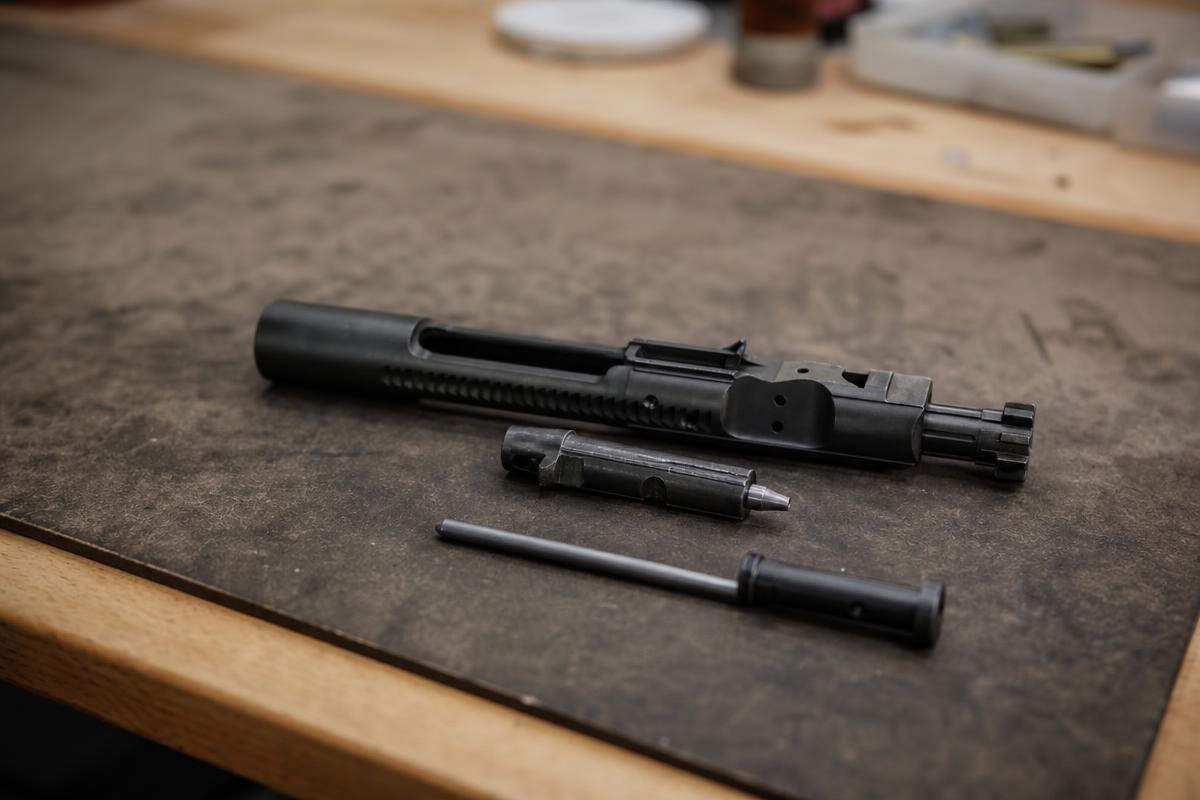
The carrier assembly deserves close attention because it handles locking, extraction, and cycling. Focus on function-related wear, not normal carbon staining. A dark bolt tail by itself does not mean the bolt has failed.
Wipe Down the Bolt Carrier Group
Clean the carrier, bolt body, firing pin, cam pin, and bolt face with solvent-dampened patches or a nylon brush. Remove fouling from the bolt face and extractor recess without gouging the surfaces. Dry each part before lubrication so solvent does not dilute the oil. Do not remove staked gas-key screws for cleaning or alter the gas key. Avoid aggressive scraping around the bolt tail, where hard tools can damage the finish or remove material unnecessarily.
Inspect Wear Points Before Lubrication
Check the extractor for chipped edges and inspect its spring components for damage or distortion. Look for cracks at the cam pin hole, damaged gas rings, a bent firing pin retaining pin, unusual peening on the locking lugs, and movement at the gas key. Gas-ring checks vary by manufacturer and test method. Follow the firearm or bolt carrier group manufacturer’s specified orientation and acceptance criteria rather than relying on an abbreviated field test.
Any crack, missing material, loose gas key, serious lug damage, or repeated malfunction should keep the rifle out of service until a qualified gunsmith or the manufacturer evaluates the cause. Cleaning can expose a problem, but it cannot determine headspace or correct a mechanical fault.
Clean the Charging Handle and Upper Receiver Interior
Wipe the charging handle channel, latch area, and upper receiver interior with a clean patch. Remove loose fouling from the carrier raceways, but do not pack the receiver with solvent. Check that the dust cover closes properly to protect the ejection port during storage and transport.
If your inspection identifies a damaged component and you need fitment help before ordering, AR15Parts.com can be reached at (888) 706-0633.
Where Should You Lubricate an AR-15?
Lubricate an AR-15 only after solvent residue and moisture are wiped away. Apply a light, even film to moving metal contact areas, following both the lubricant label and your rifle manufacturer’s instructions.
Apply a Light Film to Moving Metal Surfaces
Place a light film of lubricant on the carrier rails, the exterior of the bolt where it rides in the carrier, the cam pin and cam path, and the bearing surfaces that travel inside the upper receiver. Apply a small amount to the charging-handle contact points where it slides in the upper.
Do not leave heavy pools of oil in the receiver, bolt face, chamber, or firing pin channel. Excess oil can collect carbon and fouling during extended firing. Wipe away visible pooling before reassembly.
Reassemble in the Correct Order
Install the charging handle first. Slide the carrier assembly into the upper second, then join the upper and lower receivers and secure both takedown pins.
Confirm the carrier moves freely without forcing it. If parts bind, stop and inspect alignment, cleanliness, and component condition before cycling the action again. If major upper components need replacement, see our complete AR-15 uppers for available options.
Perform a Basic Function Check With No Ammunition Present
Keep all ammunition off the bench before checking the rifle. Follow your rifle manufacturer’s complete function-check procedure rather than relying on a shortened generic sequence.
Verify selector operation, trigger reset, and bolt movement only in the sequence specified by the rifle manufacturer. A basic function check cannot confirm headspace, firing-pin condition, or safe live-fire operation. If a control feels abnormal, stop and have the rifle inspected before use.
When Cleaning Reveals a Part That Needs Attention
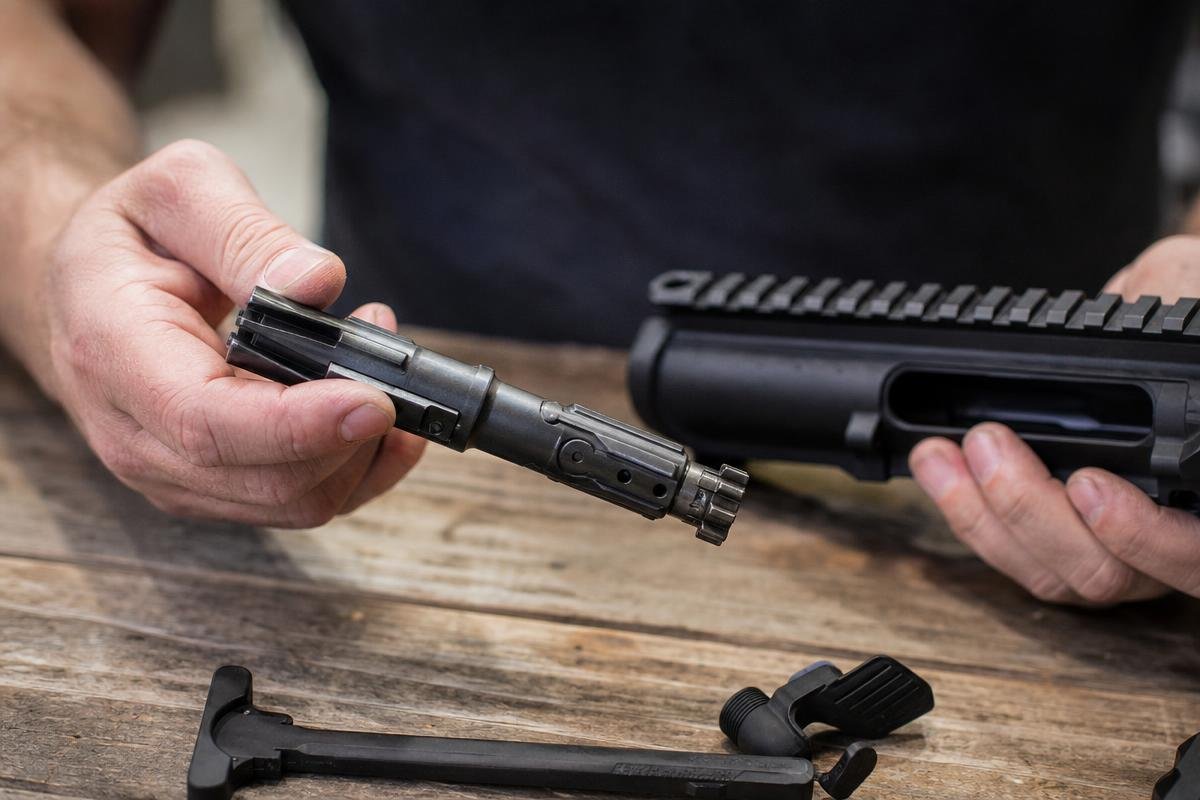
Cleaning is also an inspection opportunity. Work through the rifle slowly and look for conditions that can affect safe function before the next range session.
Visible Damage and Binding Parts
Stop and address visible cracks, bent pins, damaged threads, worn extractor parts, loose handguard hardware, or a charging handle that binds. Check screws and mounting hardware for movement. Remove a handguard only when maintenance requires it, and follow the manufacturer's instructions before disturbing mounting hardware.
A damaged upper assembly may need more than cleaning. Our selection of complete AR-15 rifles gives you a replacement option when inspection finds damage beyond a practical repair.
Fouling Is Not a Diagnosis
Heavy carbon does not automatically mean a gas-system failure. Cleaning the carrier assembly may reveal residue, but repeated failures to feed, extract, eject, or lock back require a broader assessment.
Evaluate ammunition, magazines, lubrication, gas-system configuration, and component condition together. A worn extractor, weak extractor spring, damaged magazine, or incorrect gas setup can produce similar symptoms. If problems continue after normal cleaning and inspection, stop firing and seek qualified service rather than replacing parts by guesswork.
Prepare the Rifle for Secure Storage
Wipe exterior surfaces dry and apply a light protective film to exposed metal where appropriate. Leave a clean chamber, then store the rifle securely under applicable laws and manufacturer instructions. Keep any firearm inaccessible to unauthorized users. Before returning a stored rifle to service, inspect it again for moisture, corrosion, damaged parts, and excess lubricant.
A Denison, TX Resource for AR-15 Maintenance Parts

AR15Parts.com ships from our Denison, TX facility at 4000 Texoma Parkway, Denison, TX 75020. We supply firearms, parts, and accessories, and the cleaning steps above offer a practical maintenance baseline before selecting replacement components online.
Match Replacement Parts to the Rifle Configuration
A replacement part fits only if its specifications match your rifle. Confirm caliber, gas-system length, receiver pattern, and intended configuration before ordering a carrier assembly, barrel, gas tube, or upper.
Check barrel markings and measure the gas system if needed. A carbine-length gas tube does not fit a mid-length setup. Compare your notes with our complete AR-15 uppers before changing major assemblies.
Use Visual Instruction to Confirm the Cleaning Order
A labeled photo sequence or embedded video walk-through helps first-time owners confirm field stripping, cleaning, lubrication, and reassembly in the proper order. Keep your cleaning kit beside the rifle so each part stays organized.
Visual instruction can also help you spot a missing retaining pin, worn gas rings, or unusual carrier wear before you buy parts. If you need help identifying a compatible component, contact AR15Parts.com at (888) 706-0633.
Frequently Asked Questions
How Often Should You Clean an AR-15?
How often to clean an AR-15 depends on firing volume, ammunition, weather exposure, suppressor use, and storage. Inspect it after each range trip, then clean it before fouling, moisture, or old lubricant builds up.
Do You Need to Fully Disassemble an AR-15 for Routine Cleaning?
No. Routine field stripping is normally enough for AR-15 bolt carrier group cleaning, chamber access, and inspection. Deeper disassembly should follow the manufacturer’s instructions and should be performed only if you understand the procedure.
Should an AR-15 Be Cleaned to Bare Metal After Every Range Trip?
No. A rifle does not need bare-metal cleaning after every session. Remove heavy carbon, moisture, and contaminated lubricant without aggressive scraping or unnecessary solvent exposure.
What Lubricant Should You Use on an AR-15?
Use firearm-rated lubricant sparingly on moving contact surfaces. Your AR-15 cleaning kit should support cleaning and lubrication, not leave excess oil that collects grit.
What Should You Do if Malfunctions Continue After Cleaning?
Stop using the rifle until it is inspected for magazine, ammunition, gas-system, extractor, bolt, or assembly issues. Use this routine before replacing worn components, then browse complete AR-15 uppers or call our team at (888) 706-0633 for product questions.
Which AR-15 Parts Should You Lubricate After Cleaning?
Apply a light film of firearm-rated lubricant to the carrier rails, cam pin, bolt contact surfaces, and charging-handle contact points. Avoid excess oil that can pool inside the receiver or collect grit.
Ready to Get Started with AR15Parts.com?
Call (888) 706-0633 to speak with our team directly. We're ready to answer your questions, walk you through your options, and help you find the right solution for your needs. Whether you're just starting to plan or ready to move forward, we'll make the process simple and stress-free. Reach out today and let's talk about how we can help.