

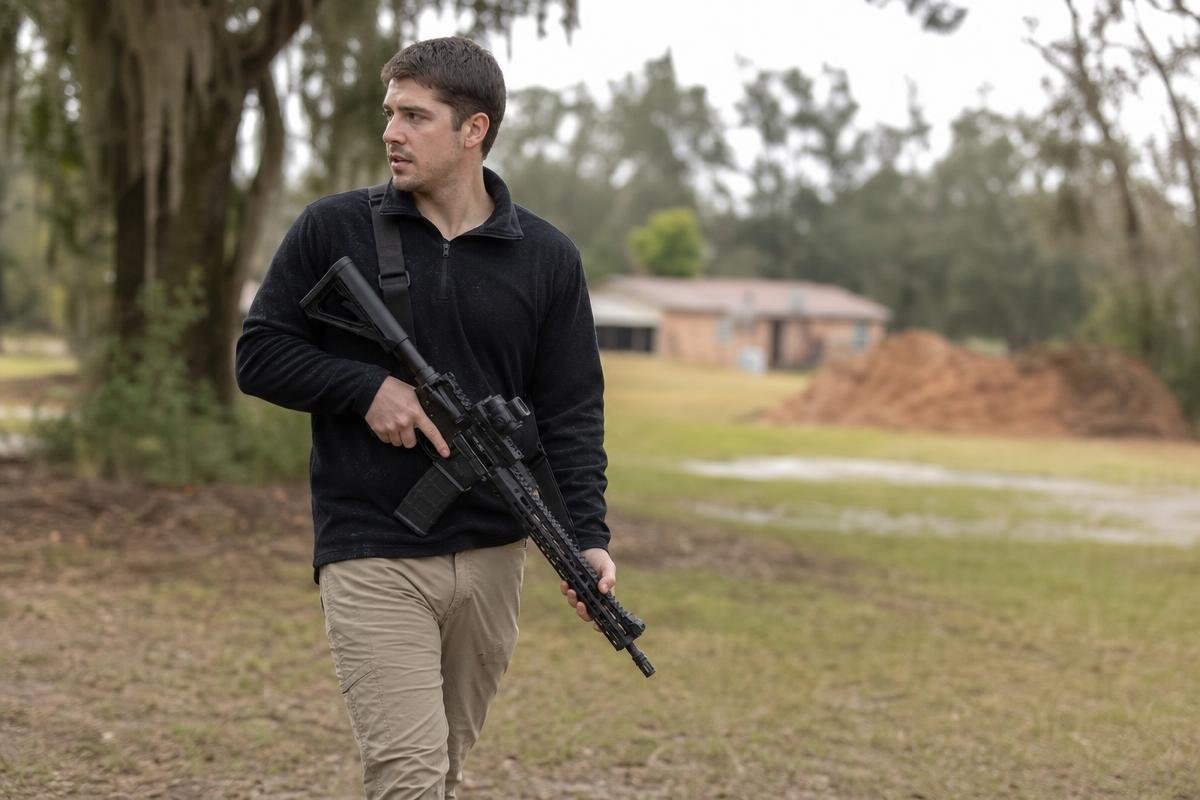
For most practical outdoor use, a two-point sling with an adjustable slider is the best general AR-15 sling setup. It keeps the rifle close when walking uneven ground, opening gates, carrying tools, or getting in and out of a vehicle, while still allowing a controlled shoulder position when needed. In the Denison and wider Texoma area, choose webbing and hardware you can adjust over hot-weather clothing, sweat, and cooler seasonal layers.
Key Takeaways
- A two-point sling is the most versatile choice for controlled carry, gate work, vehicle transitions, and general outdoor movement.
- Match the sling hardware to the rifle’s actual stock, endplate, handguard, socket, loop, or stud interface.
- Set the adjustment range while wearing the layers you use during hot Texoma weather and cooler seasonal conditions.
- After field use, inspect webbing, mounting hardware, and recessed sockets for dirt, wear, and secure engagement.
What Is the Best AR-15 Sling Setup for Property Carry?
For most owners, the best option is a quick-adjust two-point sling mounted near the front half of the handguard and at the stock or receiver area. This configuration controls rifle movement better than a single-point design during walking, bending, gate work, and vehicle entry, while allowing the sling to loosen for a safe, controlled shoulder position.
| Sling style | Best use | Primary tradeoff |
|---|---|---|
| Two-point | General outdoor carry, fence-line work, walking, and vehicle transitions | Requires correct length and front-to-rear routing |
| Single-point | Short-duration use where shoulder transitions are the priority | Allows more rifle swing when bending or moving |
| Three-point | Specialized retention preferences | Extra webbing can complicate adjustment and snag management |
What a Two-Point Sling Connects To
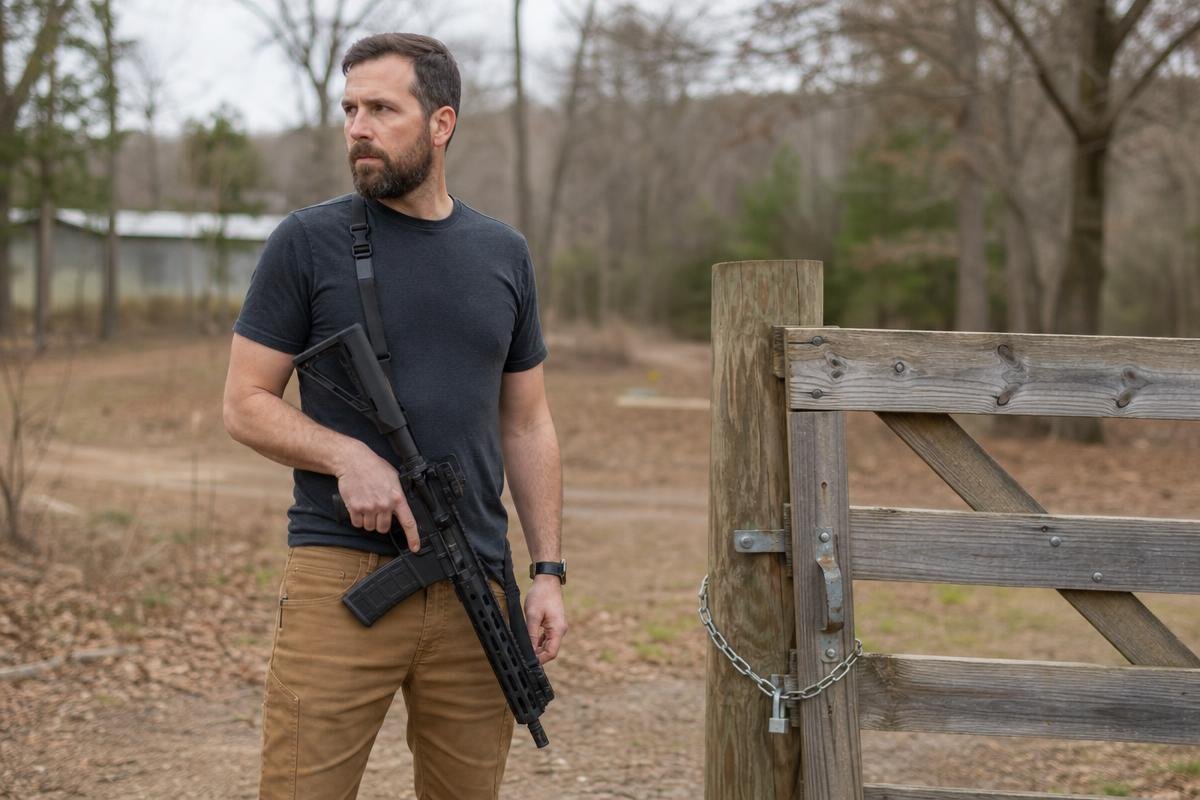
The front connection usually mounts near the handguard. The rear connection mounts at the stock or receiver end plate. This creates a stable carry loop that helps limit uncontrolled movement while leaving your hands available for gates, equipment, and other tasks.
Before buying hardware, identify the attachment interface already on your rifle. Common examples include recessed QD sockets, fixed loops, swivel studs, M-LOK handguard slots that need a separate mount, and stock-mounted sockets. If you are still selecting a rifle, review our AR-15 complete rifles before choosing mounts and sling hardware.
How Single-Point and Three-Point Designs Differ
A single-point sling connects near the receiver and can simplify shoulder transitions. Its tradeoff is more rifle swing, especially while bending, climbing into a vehicle, or moving through brush.
A three-point sling uses additional webbing routed around the rifle and body. It can provide retention, but the added straps may snag or complicate adjustment. For most Grayson County property use, a simpler two-point configuration is easier to fit, operate, and inspect.
Why a Quick-Adjust Slider Matters
A quick-adjust slider is a buckle or pull tab that changes sling length without removing the rifle. Pull it tight to cinch the rifle against your chest before moving through obstacles or around vehicles.
Pull the tab in the opposite direction to loosen the sling for a controlled ready position. Set the adjustment while wearing the clothing you normally use, including a light shirt during hot weather and a jacket during colder Texoma mornings, then confirm the rifle can be shouldered without binding.
Already know you want a two-point configuration?
Match Sling Hardware to Your Rifle’s Attachment Points
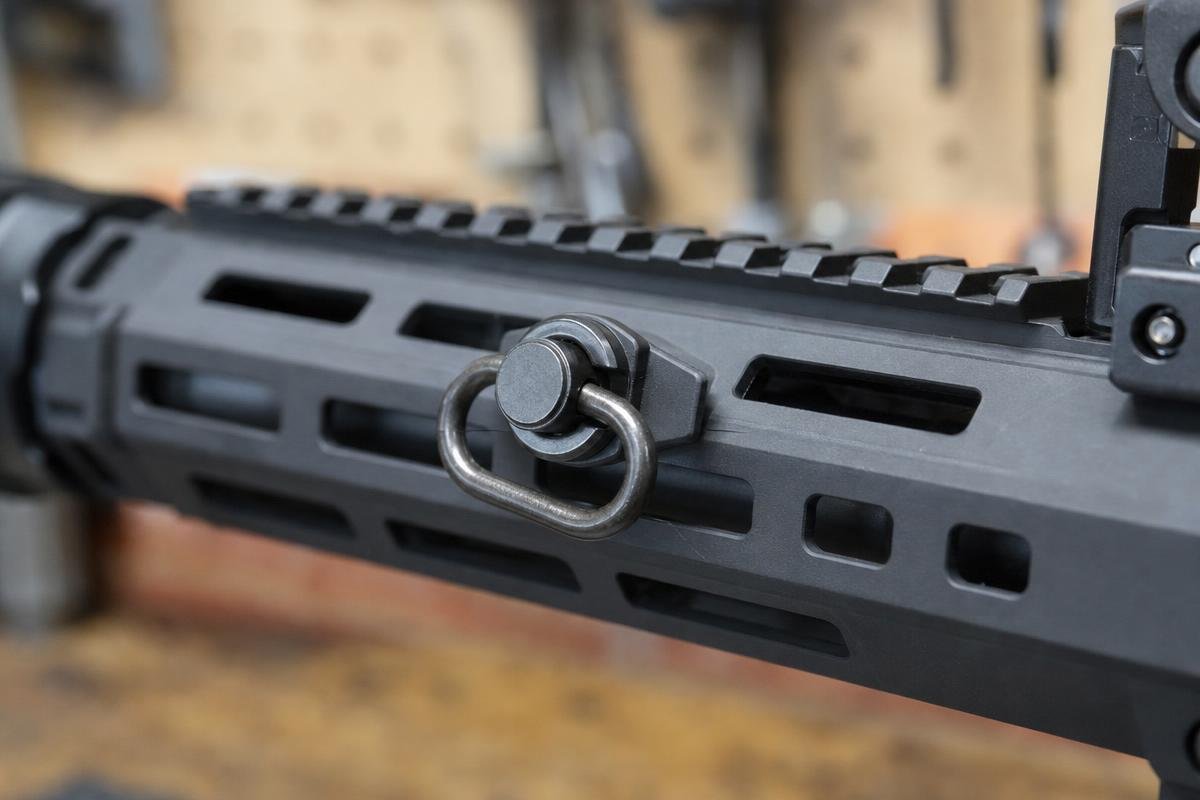
Rifle sling mounts must match the attachment points already on your firearm. Compatibility depends on the socket type and depth, the stock or endplate design, the handguard interface, and the mounting hardware specified by the component manufacturer.
Check QD Swivels and Recessed Sockets
A push-button QD swivel locks into a compatible recessed socket. Press the button, insert the swivel fully, release it, then pull firmly in several directions to verify full lockup.
Do not assume a socket accepts every swivel because it looks similar. Check for a true QD socket, sufficient engagement depth, clear locking grooves, and debris that can prevent complete insertion. Stock design, endplate design, socket dimensions, and manufacturer-specific hardware requirements all affect fitment.
Choose the Right M-LOK Sling Mount
An M-LOK handguard often needs a separate sling mount because the slots are not sling attachment points by themselves. Choose a mount made for M-LOK, place it where the sling clears your support hand, and follow the mount manufacturer’s installation and torque guidance.
Front placement near the forward half of the handguard gives you room to control the rifle without webbing crossing the grip area. Check that the mount does not block a light, bipod, or other handguard accessory on your AR-15 complete upper.
Compare Rear Attachment Positions
Buttstock mounting is straightforward and works well for most outdoor carry needs. A receiver extension area mount can bring the sling closer to your body, while a receiver endplate mount positions it at the rear of the lower receiver.
Test each position with your preferred shoulder. The webbing should not block stock adjustment, charging-handle access, or a clean shoulder mount. If you need help matching hardware to one of our AR-15 complete rifles, contact our team before mounting it.
How to Install a Two-Point Sling on an AR-15
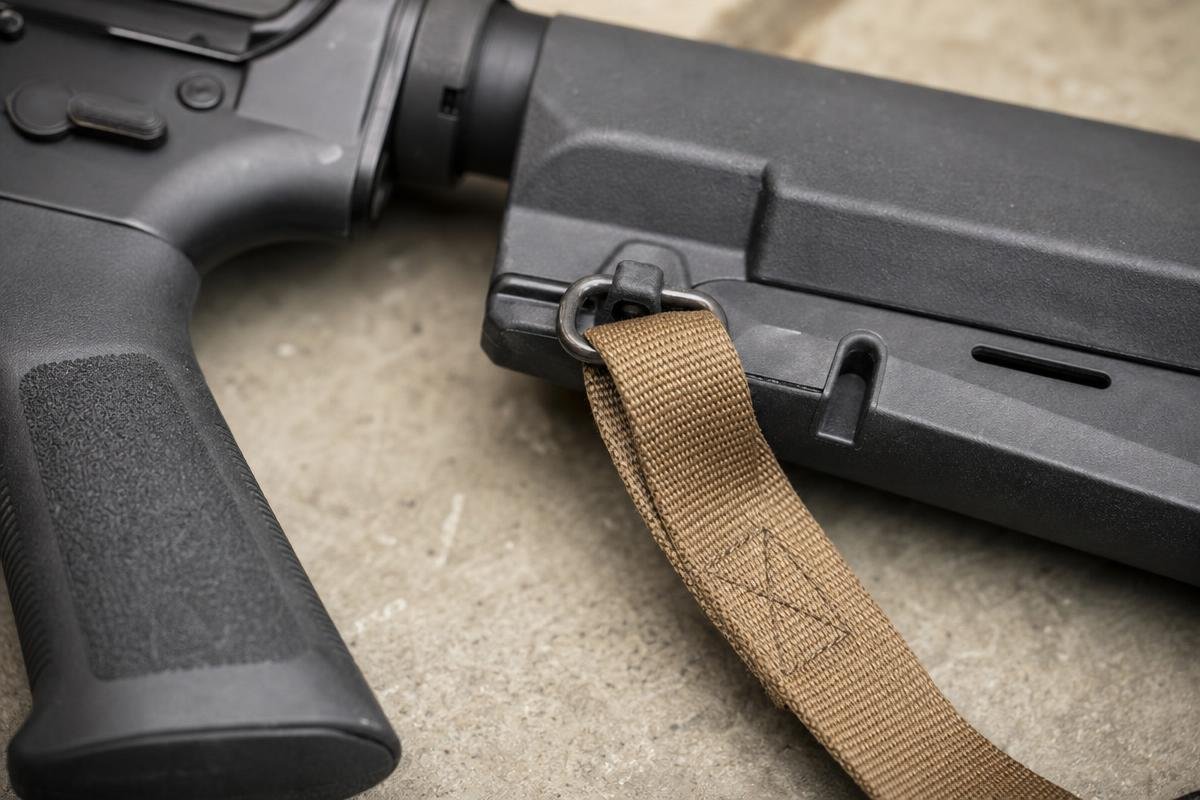
A proper AR-15 sling setup requires an unloaded rifle, compatible front and rear mounting points, flat webbing routed through the swivel and tri-glide, and a final movement test. Remove all ammunition from the work area, verify the chamber is empty, and keep the muzzle pointed in a safe direction throughout installation.
1. Clear the Rifle and Work Area
Remove the magazine, lock the action open, and visually and physically inspect the chamber. Keep loose ammunition off the bench so it cannot be mixed into the setup process.
2. Choose the Front Attachment Position
Place the front mount in the front half of the handguard. A QD swivel near the support-hand area provides control without placing the mount so far forward that it interferes with your grip. Check that the sling does not cover a light switch, hand stop, or other handguard accessory. If you are starting with one of our complete AR-15 uppers, confirm the handguard has a compatible QD socket or attachment slot before selecting hardware.
3. Choose the Rear Attachment Position
Mount the rear point at the stock or receiver area based on how the rifle carries against your body. A stock-mounted point usually keeps routing simple, while a receiver-area point can position the rifle closer to the torso.
Keep the webbing clear of the charging handle, stock adjustment latch, safety selector, and other operating controls. Test both positions before committing to one.
4. Lock the Swivels or Mount Hardware
Seat each QD swivel fully into its socket and pull firmly to confirm the locking balls have engaged. For bolt-on mounts, follow the hardware maker’s torque guidance and inspect the fasteners after initial use.
For loop-style mounts, ensure the webbing lays flat and the attachment cannot work loose. Confirm every connection before carrying around gates, vehicles, or equipment.
5. Thread the Webbing Through the Swivel and Tri-Glide
Pass the flat webbing through the swivel, then route the loose end back through the tri-glide. Flatten every twist before pulling the webbing firmly through the slots. The webbing should not slip under normal tension. Follow the sling manufacturer’s threading instructions, since a reversed tri-glide route can loosen during use.
6. Set a Starting Length and Test the Adjustment Tab
Set the two-point sling long enough to shoulder the rifle without binding. The adjustment tab should sit where you can reach it with your support hand, without searching under the webbing.
Pull the tab to cinch the rifle closer, then extend it again and confirm the sling moves smoothly. Finish with a sling adjustment test while walking, bending, and moving around obstacles. If you need help matching mounts to your rifle, contact our team.
Adjust the Sling for Carry, Ready Position, and Movement
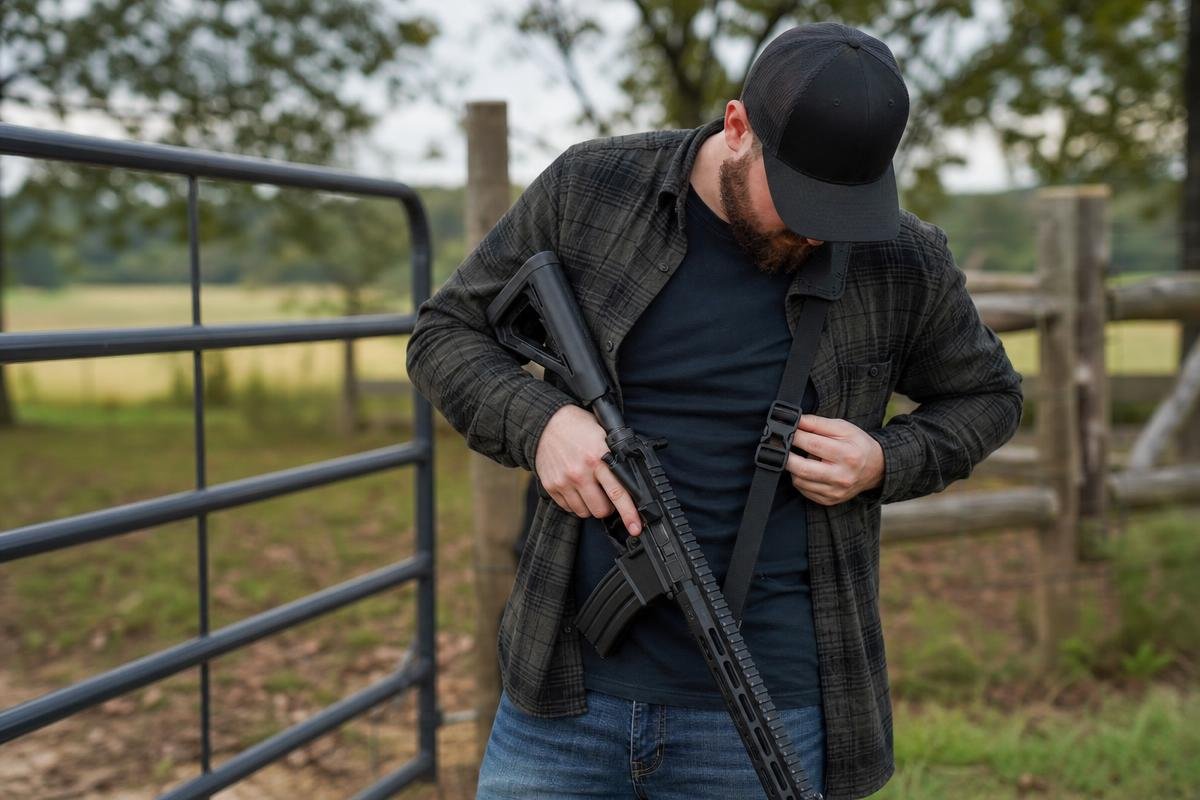
A properly adjusted rifle sling holds the firearm close enough to limit swinging while you move, but loosens into a controlled ready position. Set it with the unloaded rifle you actually carry, including the clothing and outer layers you expect to wear.
Set the Cinched Carry Position
For walking around a property, cinch the sling until the rifle stays against your torso without bouncing into your knees. You should be able to bend, step over low obstacles, and open a gate without the muzzle or stock swinging free.
Start with the rifle across your front or slightly to the support side. The adjustment tab should remain easy to find by feel. If it disappears under your arm or behind a jacket, change the sling routing before heading outside.
Loosen the Sling Without Binding
Locate the adjustment tab, pull it forward, and loosen only enough to bring the rifle into a ready position. Too much slack lets the rifle swing. Too little slack binds the stock against clothing and prevents a clean mount.
Your support-side arm may need to move between the sling and handguard, depending on your carry position and front attachment point. Practice that motion slowly with an unloaded rifle. A properly fitted sling should not trap your arm, shirt, or outerwear during the transition.
Test Movement Before Outdoor Use
Test the setup in a safe, lawful setting before relying on it outdoors. Sit down, bend at the waist, open a gate, step around equipment, and get in and out of a vehicle. Check that the rifle remains controlled through each movement.
Texoma heat can make clothing damp with perspiration, while brush, dirt roads, and fence-line work can introduce grit into hardware. Inspect the webbing, adjustment hardware, and attachment points after use. If you are setting up one of our AR-15 complete rifles, confirm the sling clears your controls and magazine changes before carrying it.
Need help matching your rifle and sling setup? Call AR15Parts.com at (888) 706-0633.
Common AR-15 Sling Setup Mistakes to Correct Before Use
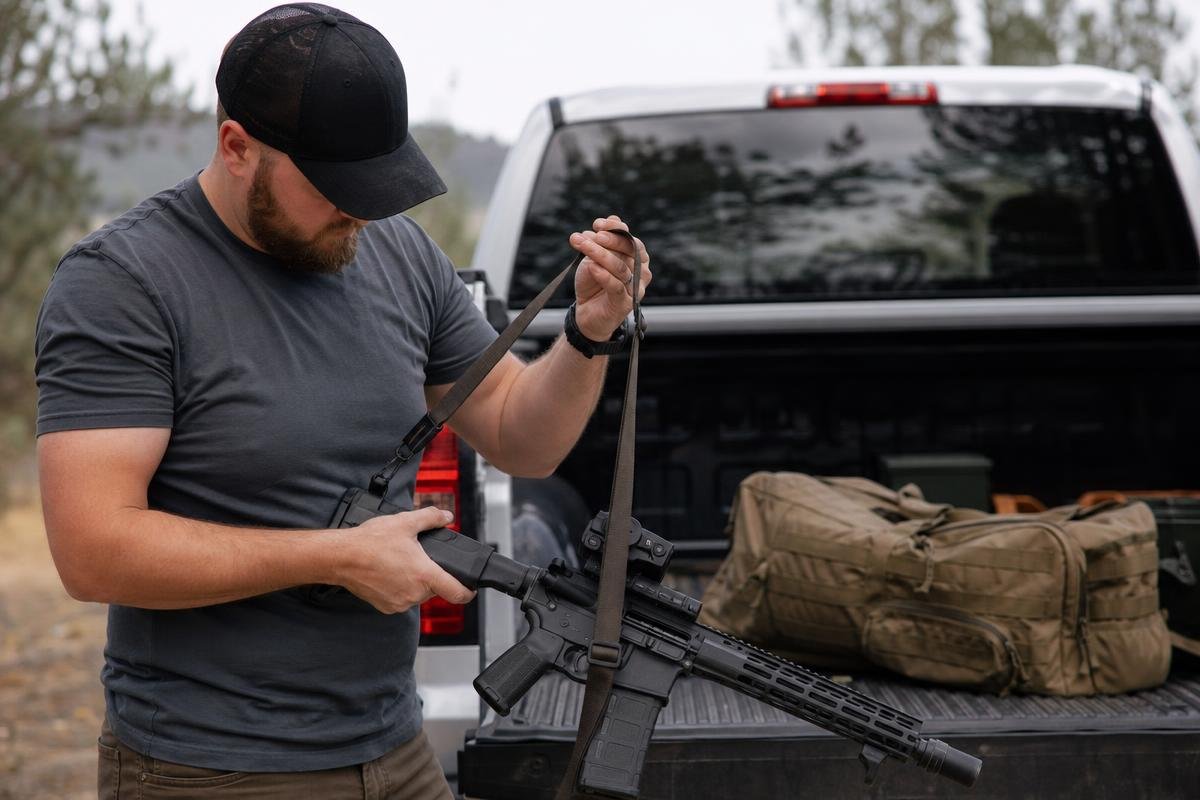
A sling should hold the rifle close, release smoothly, and leave your controls clear. Correct these four issues before moving through brush, getting in a vehicle, or adding heavier outer layers.
Mounting the Front Point Too Far Forward
A front mount near the muzzle can make the rifle feel long and less manageable. It may also take up handguard space your support hand needs for a stable grip. Move the front attachment rearward until you can grip the handguard normally. Check your attachment-point placement with the rifle shouldered, not just hanging at your side.
Leaving Twists or a Misrouted Tri-Glide
Twisted webbing can bind against clothing and make the adjustment tab difficult to find. A tri-glide routed incorrectly may allow webbing to slip under load. Lay the sling flat from rear mount to front mount. Pull firmly on each section, then cinch and loosen the adjustment tab several times to confirm it holds.
Assuming Every Mounting Interface Is Compatible
QD sockets, M-LOK mounts, stock sockets, fixed loops, and receiver-end hardware are not automatically interchangeable. A QD swivel must fully lock into the correct socket, while M-LOK hardware needs a suitable handguard mounting surface and proper installation.
Inspect your rifle’s attachment interfaces before buying hardware. If you are starting with one of our AR-15 complete rifles, identify the installed attachment interface before selecting a sling or swivel.
Skipping the Unloaded Movement Test
An unloaded movement test shows if the sling blocks controls or catches on your gear. Walk, bend, sit, shoulder the rifle in a safe direction, then cinch and loosen the sling.
Confirm the webbing does not cover the magazine release, safety selector, charging handle, or trigger guard. Check for snags on brush, work clothing, vehicle seats, and outdoor gear common around the Denison area. If you need help matching hardware to your rifle, contact our team.
Denison Property Carry Considerations for Rifle Slings
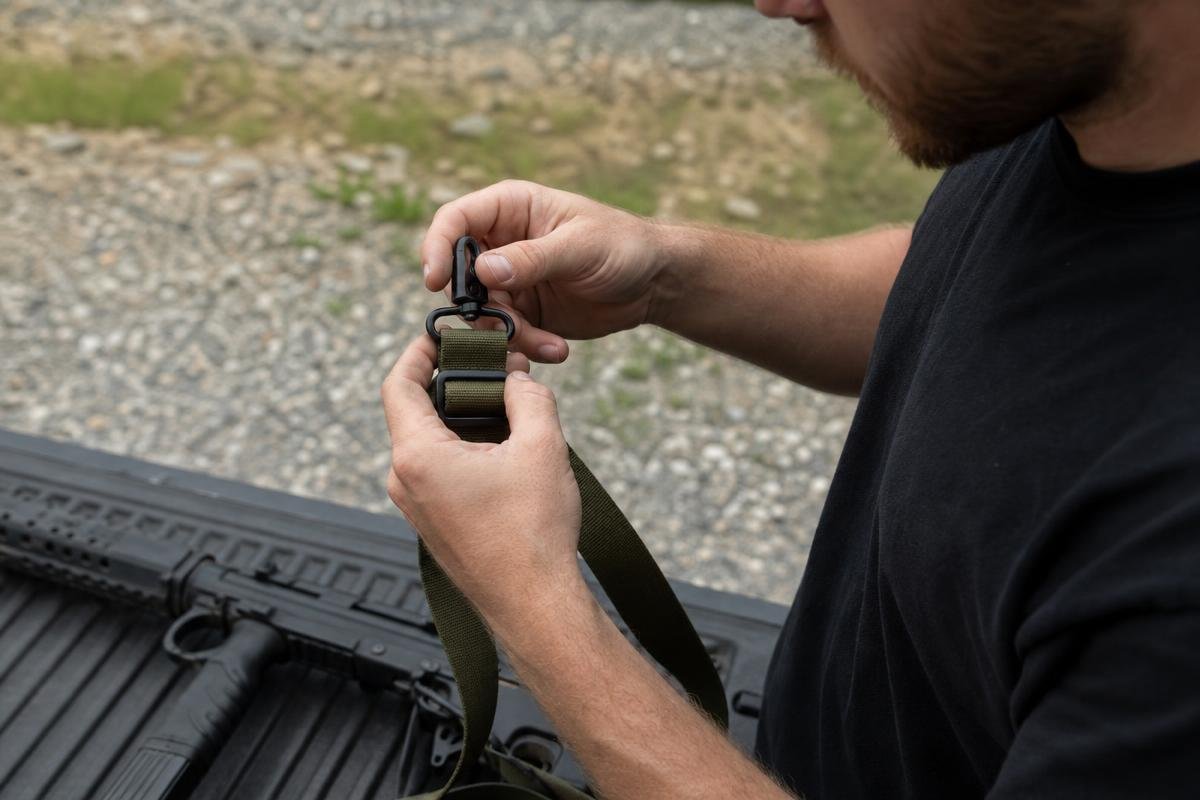
Denison sits in the Texoma region, where summer heat, sweat, seasonal rain, brush, and rural-property tasks can affect comfort and hardware maintenance. Check sling fit before heading out, then inspect the sling again after outdoor use. AR15Parts.com is located at 4000 Texoma Pkwy, Denison, TX 75020.
Inspect Webbing and Hardware After Outdoor Use
Inspect the webbing after each day spent walking fence lines, clearing brush, or working around equipment. Look for frayed edges, cuts, melted fibers, and abrasion where the sling contacts the handguard, stock, or clothing.
Check sewn sections, tri-glides, and adjustment hardware for movement or damage. Confirm each QD button fully engages in its socket by pulling firmly on the attachment points. Remove dirt from recessed sockets according to the component manufacturer’s guidance before reinstalling the swivel.
A little grit or moisture can affect how a slider feels and how smoothly a swivel seats. Make sling and mount inspection part of your normal post-use check, especially after wet weather or extended work in brush.
Check Fit Over Seasonal Clothing
Check sling fit over the clothing you normally wear outdoors. A length that works over a thin shirt can become too tight over a heavy jacket or outer layer.
Put on your normal work clothing, shoulder the rifle, and test the carry position and ready position. You should be able to reach the adjustment tab without fighting the webbing or binding the rifle against your chest.
Recheck your setup after changing layers, not just at the start of the season. If you need help selecting compatible rifle parts or complete assemblies, contact our team.
For product-fitment questions or to discuss mounting options, call (888) 706-0633.
Frequently Asked Questions
Is a Two-Point Sling a Good Choice for an AR-15?
Yes. A two-point sling setup is a solid starting point for controlled property carry because it supports hands-free movement and adjustable retention. Fit still depends on your rifle, body size, and work clothing.
Where Should the Front Sling Mount Go?
Place the front mount near the forward half of the handguard, where it clears your support hand and light controls. Built-in sockets work if present. Otherwise, install compatible AR-15 sling mounts designed for your handguard.
Should the Rear Attachment Point Be on the Stock or Receiver?
A stock mount keeps the sling farther from the receiver controls. A receiver-end mount can keep the rifle closer to your body, but check that the webbing does not cover the safety selector or charging handle.
How Tight Should an AR-15 Sling Be?
Your AR-15 sling adjustment should hold the rifle close enough to prevent swinging, while leaving room to shoulder it without fighting the strap. Check fit over the clothing you wear for outdoor work, including seasonal outerwear.
Are All QD Swivels and Sockets Compatible?
No. A quick detach sling swivel must match the socket’s diameter and locking groove. Test each swivel by pulling firmly after insertion. If your rifle lacks sockets, confirm the mount fits the handguard, stock, or receiver area.
Can a Sling Interfere With Rifle Controls?
Yes. Webbing can block the charging handle, stock adjustment latch, safety selector, or sight line. Cycle the controls and shoulder the unloaded rifle after every setup change.
Need compatible sling hardware, QD swivels, mounts, or rifle parts? We ship from our Denison, TX facility. Browse our AR-15 complete rifles, then contact our team at (888) 706-0633 if you need help confirming a product’s listed fitment details.
Ready to Get Started with AR15Parts.com?
Call (888) 706-0633 to speak with our team directly. We're ready to answer your questions, walk you through your options, and help you find the right solution for your needs. Whether you're just starting to plan or ready to move forward, we'll make the process simple and stress-free. Reach out today and let's talk about how we can help.