
Mounting a scope securely starts with compatible rail hardware, a mount that fits your optic, and manufacturer-specified torque. Below, we cover eye relief, reticle leveling, and live-fire zero confirmation. Browse our AR-15 parts and complete uppers, which we build to order, assemble in-house, headspace, and function-check at our Texas facility. Need help selecting compatible components? Contact our team.
Key Takeaways
- Knowing how to mount a scope on an AR-15 correctly prevents zero shift and protects your optic investment.
- Torque specs matter: follow the ring manufacturer's specified inch-pound values to avoid damaging the scope tube or allowing movement.
- Eye relief should be set before you tighten rings, using your scope manufacturer's eye-relief specification and a natural cheek weld.
- A one-piece cantilever mount can simplify positioning on a flat-top AR-15; compatible two-piece rings can also work.
- Follow the ring manufacturer's instructions on whether lapping is appropriate before final torque.
What You Need Before You Start: Tools and Components
Gathering the right tools before you start saves you from stripping screws, cracking scope tubes, or re-zeroing after your first range trip. Every item below serves a specific purpose. Skipping any one of them creates a problem you will deal with downrange.
Torque Wrench and Bit Set
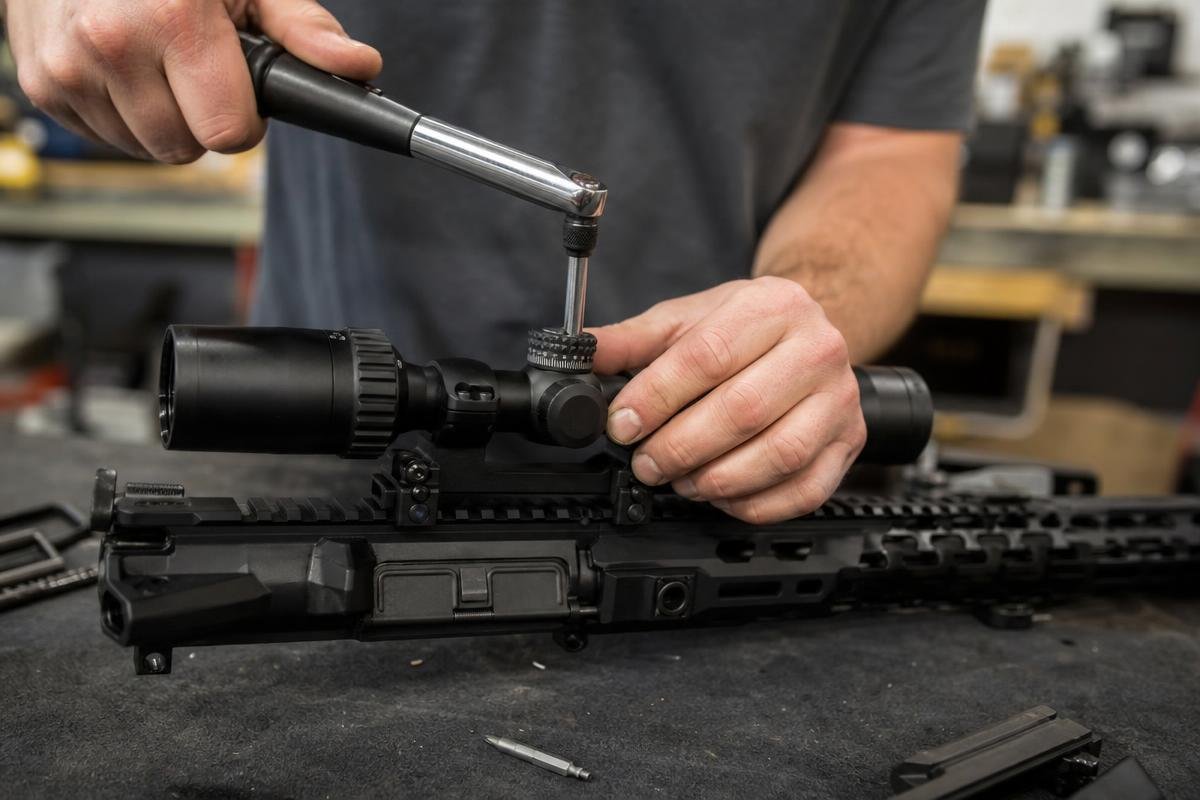
A Wheeler FAT Wrench or any calibrated inch-pound torque wrench is not optional. Ring-cap and mount-base torque values vary by product, so follow the manufacturer's specifications for each fastener. Over-torquing strips aluminum. Under-torquing lets the scope walk under recoil.
Tightening by feel with a hex key is not accurate enough. You cannot feel the difference between 15 in-lbs and 30 in-lbs by hand, and that gap is exactly where scope shift happens. Common bit sizes for AR-15 ring hardware are T15 Torx and 1/4-inch hex. Make sure your bit set covers both before you start.
Scope Rings, Mounts, and Rail Type
Not every upper uses the same rail, so check your spec sheet before you buy rings. If you are not sure what your upper has, confirm the rail standard first. You can browse AR-15 complete uppers in every major caliber to verify rail type before you order.
Ring height matters. Choose a manufacturer-stated optic centerline height that supports a repeatable cheek weld, then check objective-bell clearance over the receiver or handguard. Gas-block clearance generally does not determine scope height on a flat-top AR. One-piece cantilever mounts can simplify alignment and, when designed for it, may provide repeatable return-to-zero. Two-piece rings can also work when installed according to the manufacturer's instructions.
Loctite, Leveling Kit, and Cleaning Supplies
Use threadlocker only when the mount or ring manufacturer recommends it, and use the specified type and amount. Do not apply permanent threadlocker unless the manufacturer explicitly requires it.
Wipe down the rail and ring contact surfaces with isopropyl alcohol before assembly. Machining oil and fingerprint residue reduce friction and let hardware loosen faster than it should. Level the receiver or mount first, then align the reticle with a plumb line or the optic manufacturer's approved method. A canted reticle causes windage error at distance, and on the flat, wind-swept ground common across Grayson County, that error adds up faster than most shooters expect.
Choosing the Right Scope Mount for Your AR-15 Build
The mount is not a secondary decision. Get it wrong and your scope sits at the wrong height, your eye relief is off, or your rings stress the tube until the erector assembly cracks. Every AR-15 optics setup starts with the rail spec, then ring height, then mount style. In that order.
Picatinny vs. Weaver Rails
Most modern flat-top uppers ship with a MIL-STD-1913 Picatinny rail. Picatinny slots measure 0.206 inches wide with 0.394-inch center-to-center spacing. Weaver slots are narrower and differently spaced. Weaver rings generally fit a Picatinny rail. Picatinny-specific rings may not fit narrower or irregularly spaced Weaver slots. If your upper has a Picatinny rail, buy Picatinny-spec mounts and stop there. Mixing specs causes lateral movement under recoil, which kills your zero.
Not sure which rings fit your rail? Shop Picatinny-spec rings and one-piece cantilever mounts sized for AR-15 flat-tops.
Ring Height and Eye Relief
Compare the manufacturer's stated optic centerline height above the rail rather than relying on low, medium, or high labels. Choose a height that supports a repeatable cheek weld on your stock, then verify clearance between the outside of the objective bell and the receiver rail or handguard beneath it. A 50mm objective does not automatically require high rings.
Eye relief on most AR-15 LPVOs runs 3.5 to 4 inches. Set the scope at your natural cheek weld. Do not stretch your head forward to find the image and then lock the rings there. A poor cheek weld shows up as a black-ring edge in the glass and costs you speed on follow-up shots. For help matching ring height to a specific caliber build, compare our .223 Wylde complete uppers and confirm the receiver rail and mount specifications before ordering.
One-Piece Cantilever Mounts vs. Two-Piece Rings
A one-piece cantilever mount positions the scope forward on the rail, which can help establish proper eye relief on an AR-15. Return-to-zero capability and lapping requirements depend on the specific mount or rings, so follow the manufacturer's installation instructions and inspect alignment before final torque.
Step-by-Step: How to Mount a Scope on Your AR-15
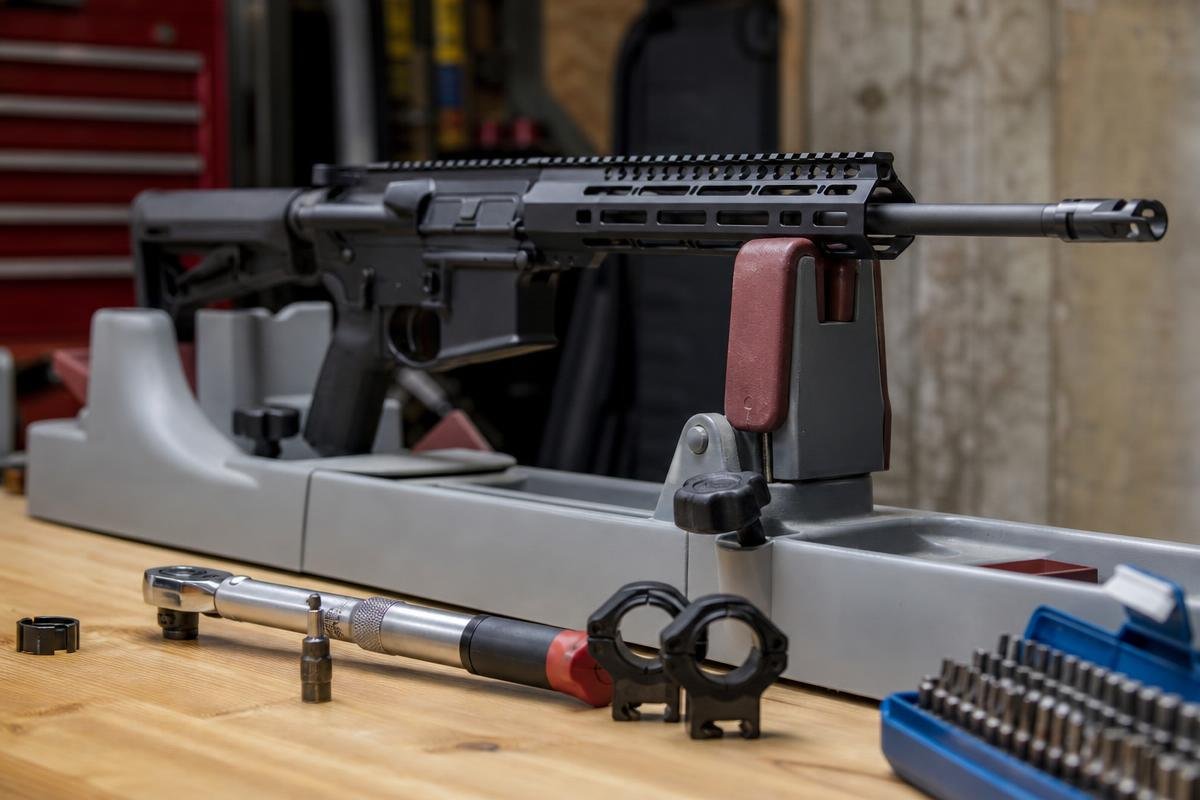
A careful installation sequence matters. You can buy the right scope and the right mount, but if the installation sequence is wrong, you will have a scope that shifts under recoil, sits canted, or destroys your eye relief at the range. Follow these steps in order. Confirm each one before moving to the next.
Step 1: Clear the Rifle and Secure It in a Vise
Remove the magazine. Lock the bolt back. Visually and physically verify the chamber is empty. This is not optional. Once the rifle is clear, place it in a padded rifle vise, a Tipton or Caldwell-style unit works well. The vise keeps the rifle from rocking when you apply torque. Any movement during tightening throws off your alignment.
Step 2: Attach the Mount or Ring Bases to the Rail
Seat the mount so the cross-bolt or recoil lug drops into a rail slot. That slot engagement is what stops the mount from walking rearward under recoil. Use threadlocker only if the mount manufacturer recommends it, then torque the hardware to the manufacturer's stated values with a calibrated torque wrench.
Step 3: Set Eye Relief Before Tightening Anything
Lay the scope in the bottom ring halves with the caps off. Do not tighten anything yet. Shoulder the rifle from your natural shooting position and slide the scope fore and aft until you get a full, clear sight picture. For most AR-15 builds, that puts eye relief at 3.5 to 4 inches. Mark the tube with a grease pencil if you need a reference point before the caps go on.
Step 4: Level the Reticle
Level the receiver or mount, then align the reticle with a plumb line or follow the scope manufacturer's approved reticle-leveling method. Use a level on the turret cap only if the optic maker confirms that the cap is square to the reticle. Rifle cant rotates the trajectory and any elevation correction, creating increasing horizontal and vertical error as distance and bullet drop increase; the shift also depends on sight height, zero, and applied elevation.
Step 5: Torque Ring Caps in a Star Pattern
Install the ring caps finger-tight first. Then tighten in a star pattern, alternating sides, so clamping pressure distributes evenly around the scope tube. Torque the ring caps evenly to the manufacturer's specified values. After torquing, look at the scope tube where the rings contact it. You should see no oval deformation. If the tube looks pinched, back off and re-torque.
Step 6: Bore-Sight and Confirm Zero at the Range
With the rifle unloaded and the upper separated from the lower, remove the BCG and view a close-range target through the bore safely from the breech. Align the reticle with what you see through the bore to help get your first shots on paper. Fire at close range, make measured adjustments based on actual impacts, and confirm your chosen zero with live fire at the actual zero distance. Bore-sighting does not establish a predictable point of impact or replace a live-fire zero.
If you are also running backup iron sights, check that they deploy without interfering with the scope and verify their zero separately.
Common Scope Mounting Mistakes and How to Avoid Them
Most AR-15 optics setup problems are not scope problems. They are mounting problems. These are common scope-mounting mistakes that can affect zero retention or the sight picture. Each one has a measurable consequence and a straightforward fix.
Skipping the Torque Wrench
Tightening ring caps by feel is guesswork. Under-torque lets the scope shift under recoil. You will see it as a zero that walks after a string of fire, not a bad scope. Over-torque crushes the tube, damages the erector, and produces a scope that tracks inconsistently. A Wheeler FAT Wrench costs less than a single range session and removes both failure modes.
North Texas summers push aluminum components through real thermal expansion cycles, which makes hitting the correct inch-pound spec even more important for AR-15 scope rings and mounts in this region.
Mounting the Scope Too Far Rearward
Mounting the scope too far rearward is a common error. Eye relief that looks correct while standing at the bench often blacks out completely in a supported prone position. Set eye relief at the natural head position you use on the stock in the field, not at a workbench. If you are unsure about your stock's length of pull and how it affects eye relief, the AR-15 stock guide covering fixed, adjustable, and folding options explains how pull length shifts your head position and scope placement.
Ignoring Reticle Cant
A canted reticle can make elevation and wind holds less reliable as distance and bullet drop increase. Level the receiver or mount, then align the reticle with a plumb line or the optic maker's approved method. Do not assume that matching bubble levels on the rail and turret cap proves the reticle is level.
Using Mismatched Ring Heights
An objective bell may contact the handguard or rail if the mount is too low; an unnecessarily high mount can make a repeatable cheek weld harder. Use the scope manufacturer's outside objective-bell diameter, divide it by two, and compare that radius with the mount manufacturer's stated optic centerline height above the rail. Account for the rail or handguard beneath the bell and leave a small clearance gap. Verify dimensions with both manufacturers before ordering; nominal objective-lens size alone is not enough.
Have questions about AR-15 scope rings and mounts for your specific build? Call us at (888) 706-0633 or contact our team online for help choosing a compatible mount.
Scope Mounting Considerations for Different AR-15 Calibers and Builds
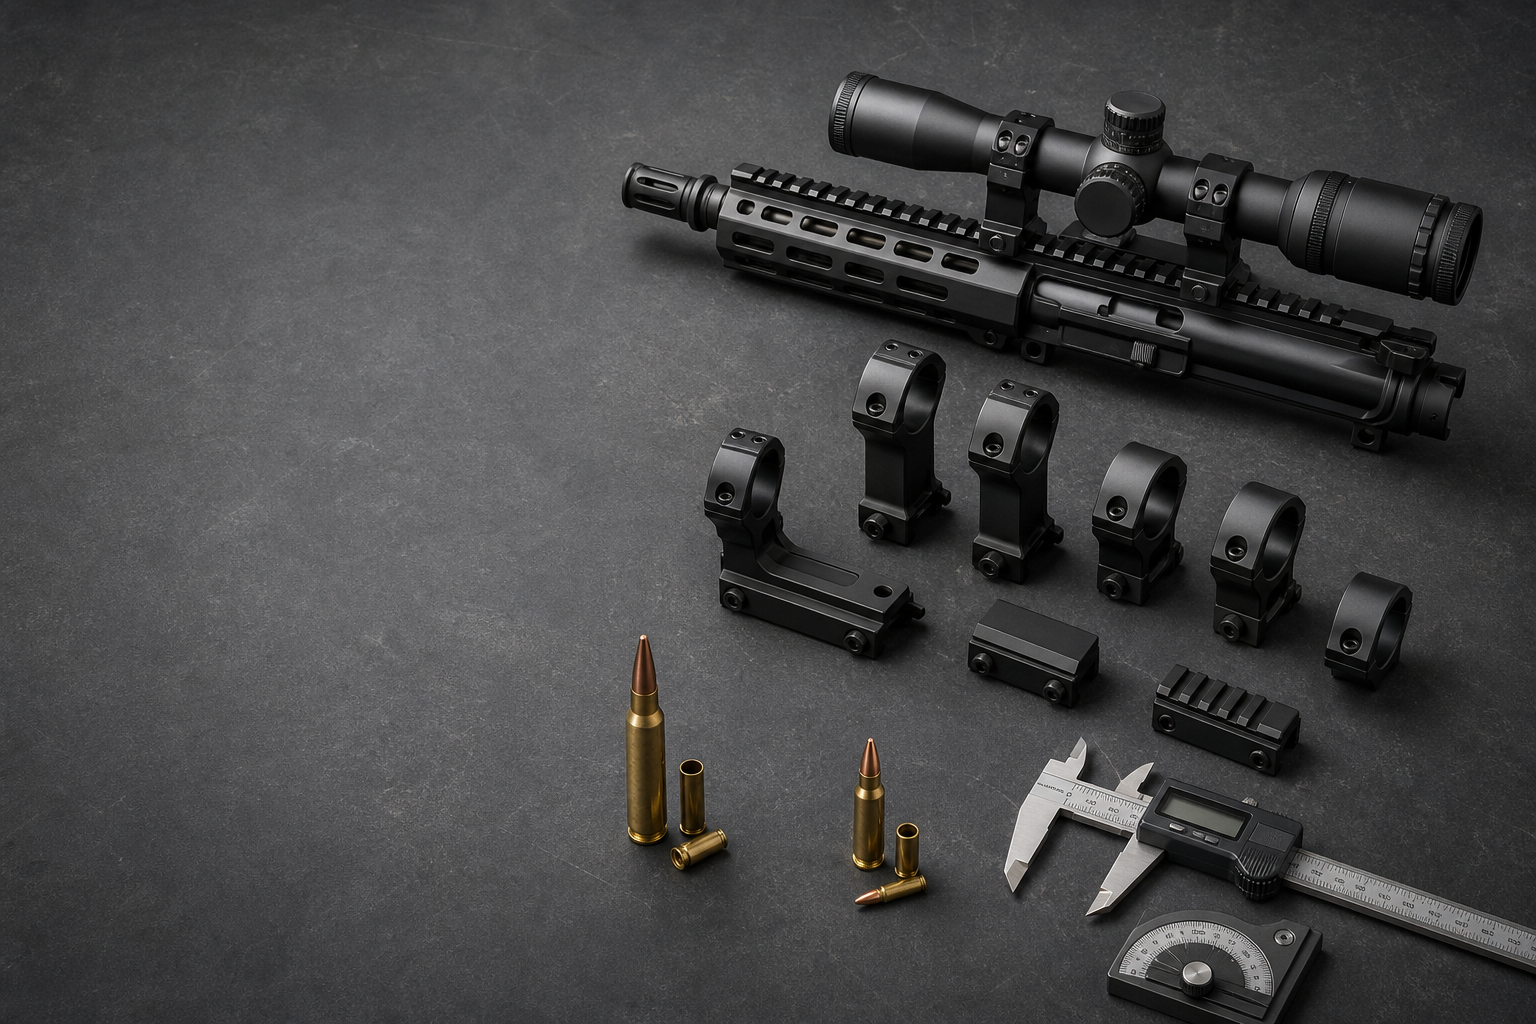
Your caliber and intended use case directly affect which mount height, ring size, and optic type will actually work. Getting the optic right for a 5.56 build looks very different from getting it right for a suppressed 300 Blackout or a long-range 6.5 Grendel. Match the optic and mount to your intended range, ammunition, stock setup, and accessory needs.
5.56 NATO and .223 Wylde Builds
A 1-6x or 1-8x LPVO on a one-piece cantilever mount covers most practical shooting from 0 to 600 yards for these chamberings. Choose a mount centerline that supports your cheek weld and clears the objective bell over the rail or handguard. If you are sourcing or upgrading your upper, compare our .223 Wylde uppers and verify compatibility with your lower and mount. Choosing rings that are too tall here pushes your eye line above the stock comb and costs you a repeatable cheek weld every time you shoulder the rifle.
300 Blackout and Suppressed Builds
For a 300 Blackout build, choose an optic based on intended range, ammunition type, stock setup, night-vision or accessory use, and the optic manufacturer's actual eye-relief specification. Barrel length and a suppressor do not inherently change the distance from your eye to a receiver-mounted optic or require a lower-profile mount. We build our 300 Blackout uppers to order, assemble them in-house, and headspace and function-check them before shipping.
Long-Range Calibers: 6.5 Grendel, 6mm ARC, and Similar
For extended-range builds, compare optic magnification, objective size, and eye relief against your shooting conditions. Select mount centerline height for a repeatable cheek weld and verify objective-bell clearance over the rail or handguard. A 20 MOA canted mount may preserve usable elevation for genuinely extended-range dialing, but calculate the elevation needed for your ammunition and intended maximum distance and verify the scope's available adjustment before choosing one.
A flat-top AR typically uses a canted mount or canted rings rather than a separate rail base; a standard mount may be sufficient for your planned distances. If you are building in this caliber, our 6.5 Grendel complete uppers are a strong starting point.
Mounting and Confirming Your Zero
Once your rings are torqued and the reticle is level, confirm your chosen zero with live fire at a range that permits the required distance. Bore-sighting can help get the first shots on paper, but it cannot replace measured adjustments and confirmation at the actual zero distance.
Our complete uppers ship from our Denison, TX facility. Contact our team with questions about ordering, availability, or compatibility.
Choosing a Zero for Your Setup
Choose a zero based on your optic, ammunition, sight height, and intended shooting distances. A 50-yard zero is one option for a 5.56 build, but a second intersection near 200 yards is not guaranteed; verify actual impacts at each distance you plan to shoot. For a 6.5 Grendel upper, choose and confirm a zero suited to your intended range rather than assuming one distance fits every build.
Environmental Factors in North Texas That Affect Your Zero
Summer temperatures in this region regularly exceed 100 degrees F. Aluminum scope rings expand slightly at high heat. Rings that felt snug at 70 degrees F can shift at 105 degrees F if you torqued them light. Hit your specified inch-pound value, not just hand-tight.
Wind across the open ground here is consistent and often significant. A properly leveled reticle is not optional in this environment. Canted reticles cause your wind holds to drift vertically, which compounds error at distance on flat ground where wind exposure is constant.
Frequently Asked Questions
What torque spec should I use for AR-15 scope rings?
Use the torque values published by the ring and mount manufacturers, because cap-screw and base-screw specifications vary by product. Apply them with a calibrated inch-pound torque wrench.
Do I need Loctite on scope ring screws?
Use threadlocker only where the mount or ring manufacturer recommends it, and follow the specified type, amount, and curing instructions.
How do I know if my scope is level on my AR-15?
First level the receiver or mount, then align the reticle with a plumb line or follow the optic manufacturer's approved reticle-leveling method. A level on the turret cap is suitable only if the optic maker confirms that the cap is square to the reticle.
Can I mount a scope without a flat-top upper receiver?
You can, but a carry-handle upper requires a carry-handle adapter that raises your sight line significantly and limits your mount options. A flat-top upper receiver is the correct starting point for any scoped AR-15 build. It gives you a full Picatinny rail and keeps your options open.
What is the correct eye relief for an AR-15 scope?
Most LPVOs sit at 3.5 to 4 inches of eye relief. Set that distance at your natural cheek weld on your actual stock, not at a stretched or craned head position. An adjustable stock makes this easier to dial in without compromising your mount position.
How often should I re-check my scope mount torque?
Check torque after your first 50 to 100 rounds. After that, every 500 rounds or after any hard use, transport, or drop. Recoil, temperature cycling, and vibration all work screws loose over time. In the Red River corridor area, summer heat regularly pushes past 100 degrees F, and aluminum expands. That thermal cycling is one more reason periodic checks matter here more than in milder climates.
Ready to choose compatible hardware? Browse our AR-15 parts and complete uppers, call us at (888) 706-0633, or contact our team online with questions about your build.
Ready to Get Started with AR15Parts.com?
Call (888) 706-0633 to speak with our team directly. We're ready to answer your questions, walk you through your options, and help you find the right solution for your needs. Whether you're just starting to plan or ready to move forward, we'll make the process simple and stress-free. Reach out today and let's talk about how we can help.